
This tutorial will show how to create a map for your adventure.
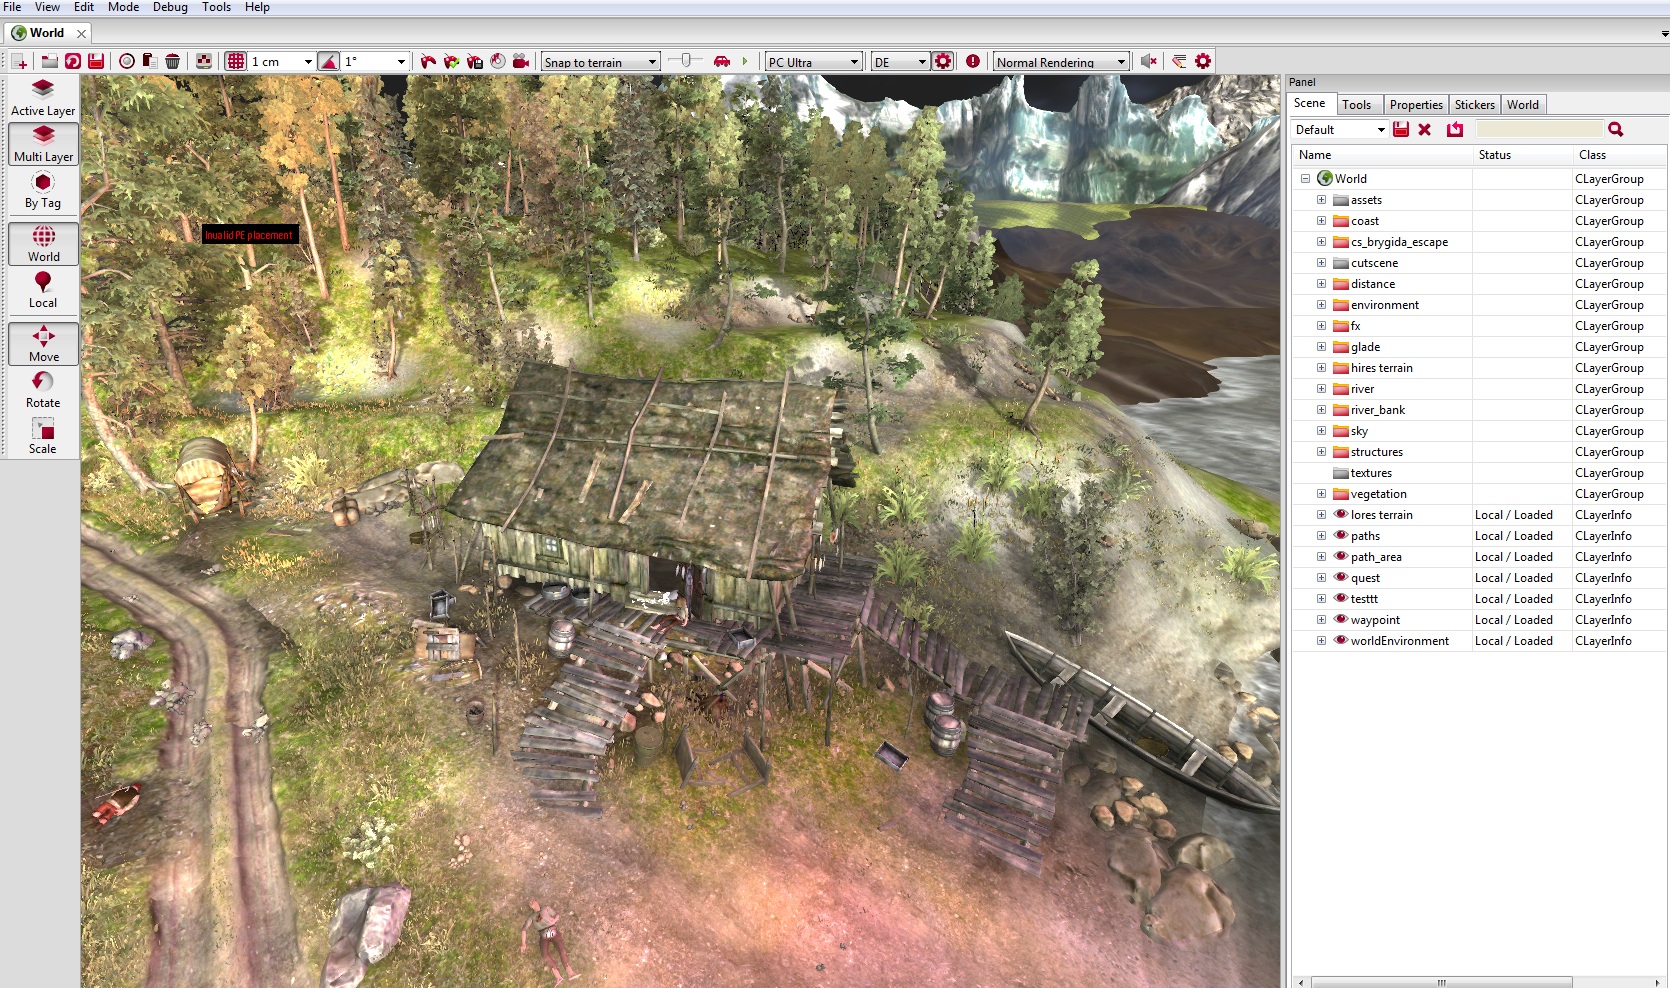
1. Open your level in the REDkit.
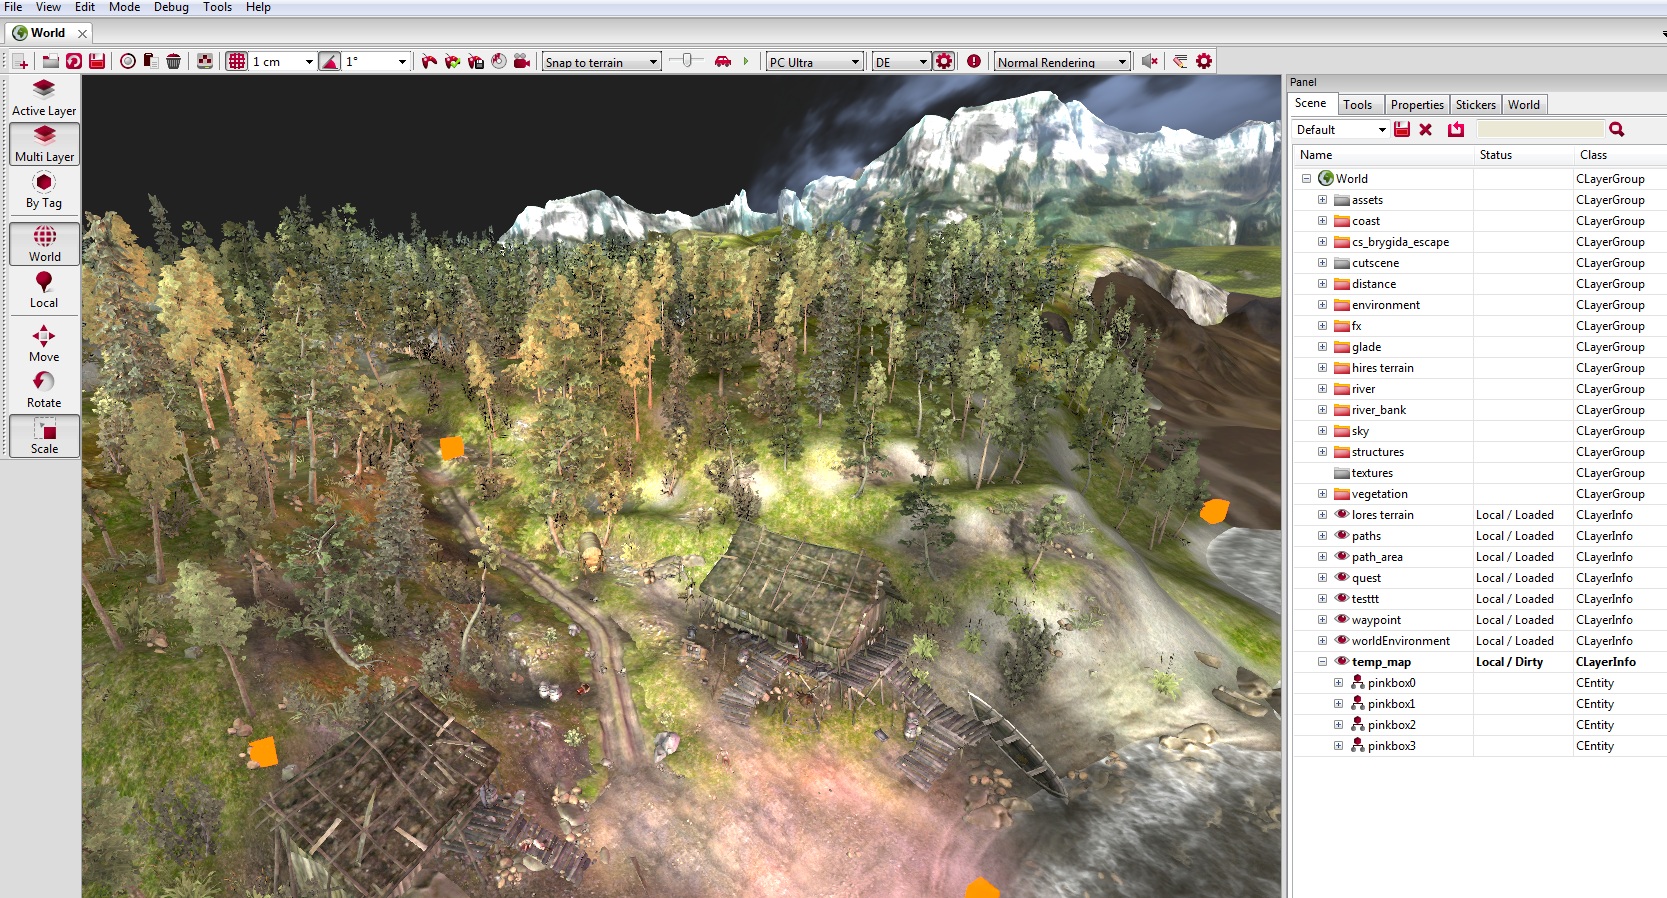
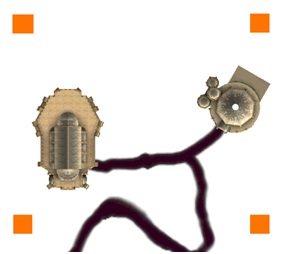
2. Create new temporary layer temp_map. In order to position your map, you will need some temporary markers. You can use pinkbox.w2mesh (engine\meshes\editor\pinkbox.w2mesh) for this purpose. Place 4 boxes on layer ‘temp_map’.
3. Press ‘M’, you will be in map mode. In map mode you can navigate your camera only left or right. Hit ‘M’ to rotate the view 90 degrees.
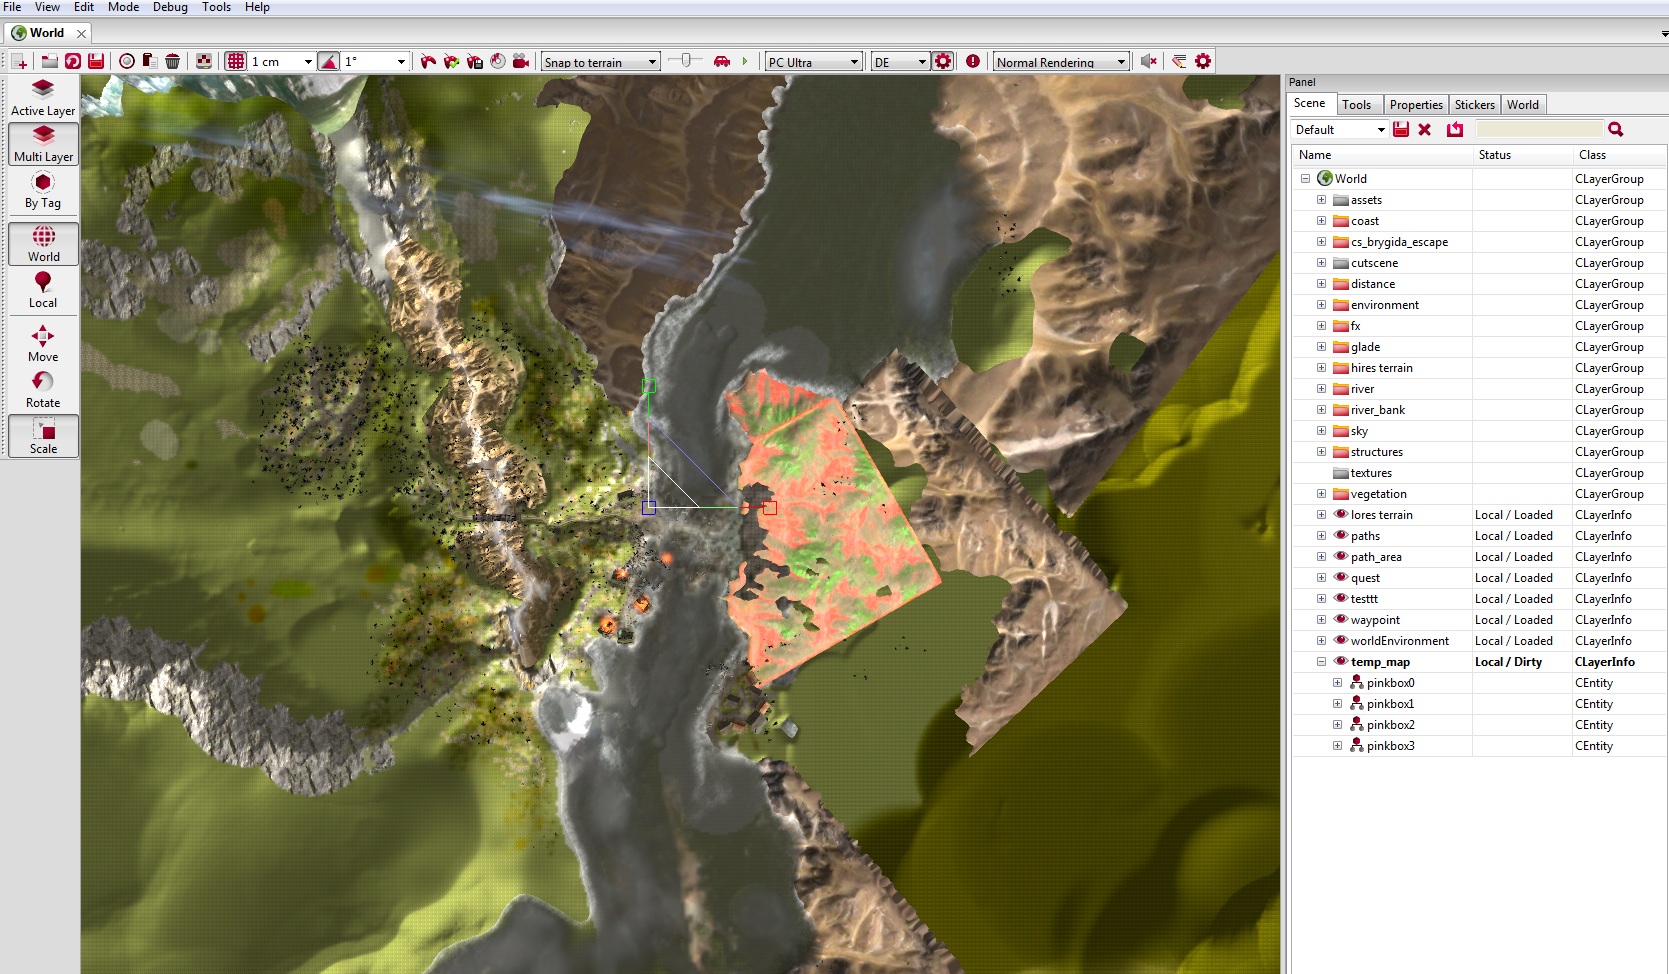
4. Position your markers so they could mark the corners of your future map. Every map is a square, so make sure to place the markers in order to form a square.
NOTE: Do it from properties menu, instead of manipulating with gizmo.
5. Print screen the current view.
6. Press ‘N’ to exit ‘map mode’
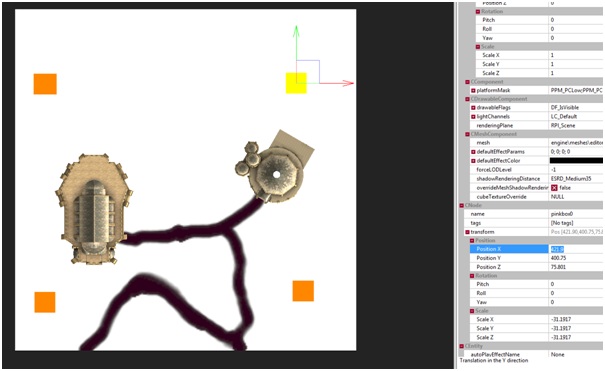
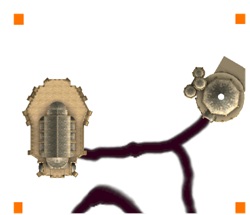
1. Open your print screen in some graphic software (Photoshop/Gimp/etc.). Crop the screen, so that the center of each marker is a corner of the image.
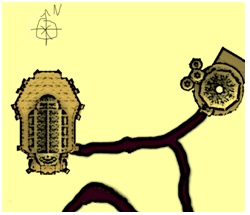
2. Make your map look cool! Make sure the map is a square. If you’re making a map for GUI, the size should be 2048x2048. If your’re making minimap it should be 512x512 or 1024x1024.
3. Save your map as *.dds file. If you can’t save it as *.dds file, look for additional plug-ins to your graphic software.
4. Name your map in following order name_heightxwidth. For example: castle_2048x2048.dds
5. Place your *.dds map in C:\Program Files (x86)\The Witcher 2\data\globals\gui\maps.
1. Open your level.
2. In Asset Browser find map_scales.csv (globals\map_scales.csv)

Write the name of your map castle_2048x2048. If you want, you can create a different minimap for this region (for example different artistic style) but for tutorial we’ll use the same map.
In MinX and Min Y fields you need to put the coordinates of the lower left marker.

In 'MinX and 'Min Y fields you need to put the coordinates of the upper right marker.
3. Make sure trigger area component and visual debug are checked.

4. Create new layer ‘mapproperty’.
5. In Asset Browser, find map_property.w2ent (templates\gameplay\map_property.w2ent) and place it on ‘mapproperty’ layer. This entity is responsible for a default map.
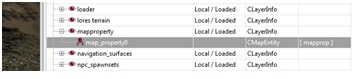
6. In scene editor, select map_property and go to its properties.
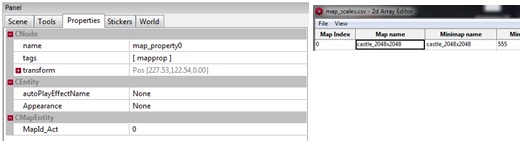
In field MapId_Act place the index of your map.
Table of contents
Creating a map
1. Open your level in the REDkit.
2. Create new temporary layer temp_map. In order to position your map, you will need some temporary markers. You can use pinkbox.w2mesh (engine\meshes\editor\pinkbox.w2mesh) for this purpose. Place 4 boxes on layer ‘temp_map’.
3. Press ‘M’, you will be in map mode. In map mode you can navigate your camera only left or right. Hit ‘M’ to rotate the view 90 degrees.
4. Position your markers so they could mark the corners of your future map. Every map is a square, so make sure to place the markers in order to form a square.
NOTE: Do it from properties menu, instead of manipulating with gizmo.
5. Print screen the current view.
6. Press ‘N’ to exit ‘map mode’
Make your map look cool
1. Open your print screen in some graphic software (Photoshop/Gimp/etc.). Crop the screen, so that the center of each marker is a corner of the image.
2. Make your map look cool! Make sure the map is a square. If you’re making a map for GUI, the size should be 2048x2048. If your’re making minimap it should be 512x512 or 1024x1024.
3. Save your map as *.dds file. If you can’t save it as *.dds file, look for additional plug-ins to your graphic software.
4. Name your map in following order name_heightxwidth. For example: castle_2048x2048.dds
5. Place your *.dds map in C:\Program Files (x86)\The Witcher 2\data\globals\gui\maps.
Making your map work
1. Open your level.
2. In Asset Browser find map_scales.csv (globals\map_scales.csv)
Write the name of your map castle_2048x2048. If you want, you can create a different minimap for this region (for example different artistic style) but for tutorial we’ll use the same map.
In MinX and Min Y fields you need to put the coordinates of the lower left marker.
In 'MinX and 'Min Y fields you need to put the coordinates of the upper right marker.
3. Make sure trigger area component and visual debug are checked.
4. Create new layer ‘mapproperty’.
5. In Asset Browser, find map_property.w2ent (templates\gameplay\map_property.w2ent) and place it on ‘mapproperty’ layer. This entity is responsible for a default map.
6. In scene editor, select map_property and go to its properties.
In field MapId_Act place the index of your map.