Table of contents
Introduction
This tutorial will help you design and implement music into your project in REDKit. REDKit’s music system is integrated with FMOD Ex Designer, which will help you organize and manage all music assets. Witcher 2 sound team used FMOD version 4.32.04, which can be downloaded here. For more information about FMOD Ex Designer middleware, please visit www.fmod.org and dedicated discussion board.
Vocabulary
To understand correctly all names used in this document, please read Chapter nine: interactive music of FMOD’s manual. You’ll have to be familiar with cues, themes, segments, banks and parameters.
Creating music structure in FMOD
FMODTV released two excellent videos showing how to handle FMOD’s interactive music system and how to design and build simple music structure which can be later used in the game:
FMOD Tutorial 9 - Interactive Music: The Basics
FMOD Tutorial 11 - Interactive Music: Techniques
You can also search for interactive music tutorials on FMOD’s wiki.
Implementing music in the game
Building Banks in FMOD
Before implementation in game’s editor, you will need to build a bank(s) containing all music tracks you worked on in FMOD. To do this, in FMOD simply go to Banks tab, check if everything’s all right (are there all files displayed in white, or maybe some tracks are missing - then FMOD will mark them with red colour). Then, in FMOD’s menu select Project -> Build, check the banks you’d like to build and press Build button. FMOD will build banks and create two files - one with *.fev extension, and one with *.fsb extension. Note that *.fsb files hold all packed audio files you put into music system, so it may be wise to split large portions of music to smaller separate banks.
Working with music in game’s editor - global
First, you will have to set up which FMOD’s bank files should be associated with your level. To do it, open World Properties:
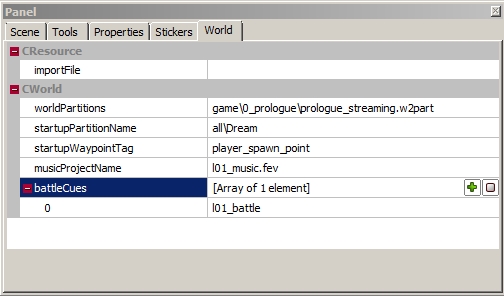
musicProjectName - type in name of the bank file you want to be connected with your project. You have to include *.fev extension. On the picture above we typed l01_music.fev, which is a music bank connected to prologue in The Witcher 2. This bank contains all music we’re going to use in our level. For each level separate bank should be created. So in our case, we created separate music bank for each act of The Witcher 2.
battleCues - here you can put all cues you want to be played when combat situation in the games starts. You can enter as many cues as you want, but please remember that game will randomly pick any cue from that list each time when combat starts. On the picture above we entered one cue, so each time the battle during prologue starts, cue l01_battle is triggered and starts to play.
For example - here’s the same window from Act I (Flotsam and forest area):
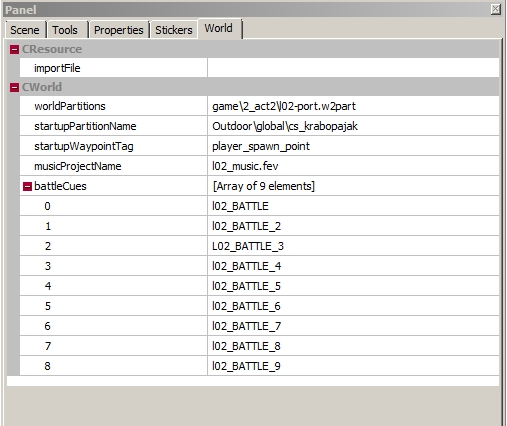
In musicProjectName we entered corresponding music bank’s name: l02_music.fev (which stands for Act I).
In battleCues we entered nine cues to be picked at random when combat starts.
Please note that musicProjectName and battleCues refer to whole level you’re working on. It’s not possible to adjust those settings while playing the game, so plan carefully how to manage combat in whole level and exploration music in proper banks.
Working with music in game’s editor - levels
When all World Properties are set, we can proceed to assign exploration/ambient music to certain areas in our game. Exploration music is handled by special triggers named Sound Ambient Areas.
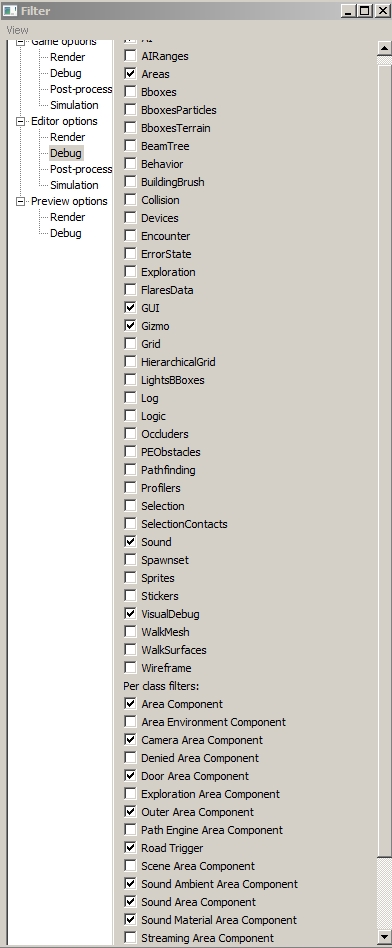
First, make sure that Sound Ambient Areas are visible in main window - select View -> Filters _debug options from menu, go to Editor options -> Debug and check boxes Areas, Sound and Sound Ambient Area Component:
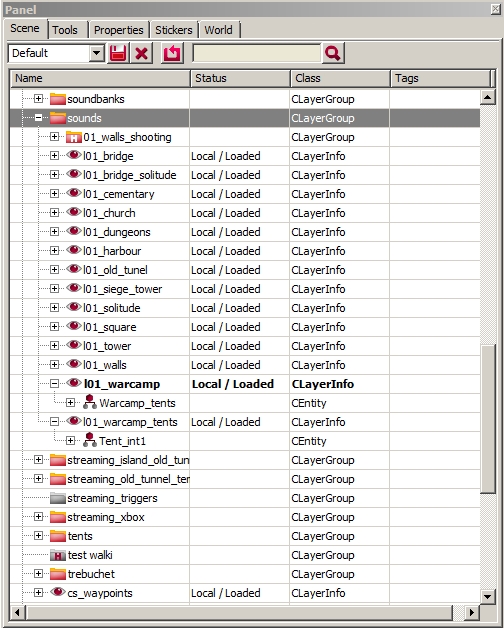
Now, in scene view, create a folder where all music layers will be located. Add a layer (right click on folder -> add layer...). Then, right click on a layer and select make active - this will allow you to place new triggers on this layer, or edit existing ones being created on that layer. Acvite layer is marked bold. In The Witcher’s 2 Prologue we kept all sound and music data in one folder - sounds:
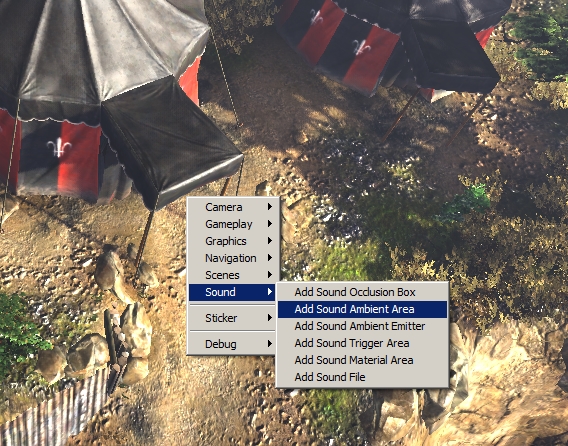
Now let’s place some triggers on our level. Right click on main window and select Sound -> Add Sound Ambient Area:
Sound triggers can be manipulated exactly the same as all other triggers. You can change their dimentions, shapes and so on.
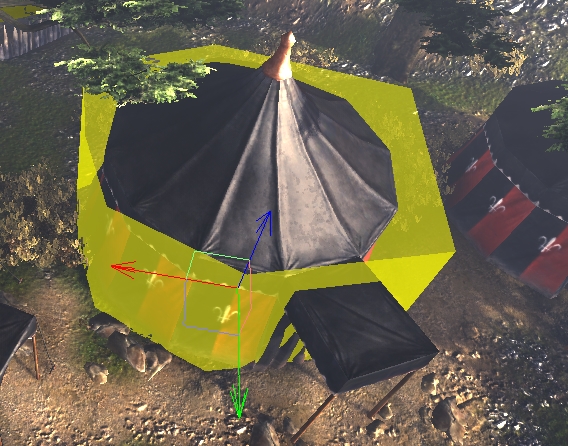
We placed our trigger:

...and after few adjustments it covers whole tent:
Now let’s set up its properties. On Scene tab select your trigger and click Properties tab:
For music, you will need to set up following fields:
maxDistance - this defines how far away from the trigger music (and sounds) will continue to play when player will exit this trigger. When player goes far enough from the trigger, music will fade out. This can be very useful when there are many triggers on the level and you’d like to create nice transitions between them. maxDistance is expressed in meters. Fade out time can be defined in particular theme’s properties in Music Tab in FMOD.
playMusicOnEnter - type cue’s name you want to play when player enters this trigger’s area. Make sure that you enter exact name of the cue you was setting up in FMOD’s music system. For Prologue in The Witcher 2 we entered l01_warcamp_tent, which plays only when player is in that tent.
It is possible to place Sound Ambient Areas triggers within other Sound Ambient Areas. By that, you can create complex structure how ambient/exploration music will behave in game. To keep proper order and hierarchy (i.e. which trigger is more important when player is in range of two or three different ones), use triggerPriority line in trigger’s properties. 0 is the highest (trigger is most important), 1 will be less important than 0, 2 will be less important than 1 and so on.
Scoring cutscenes
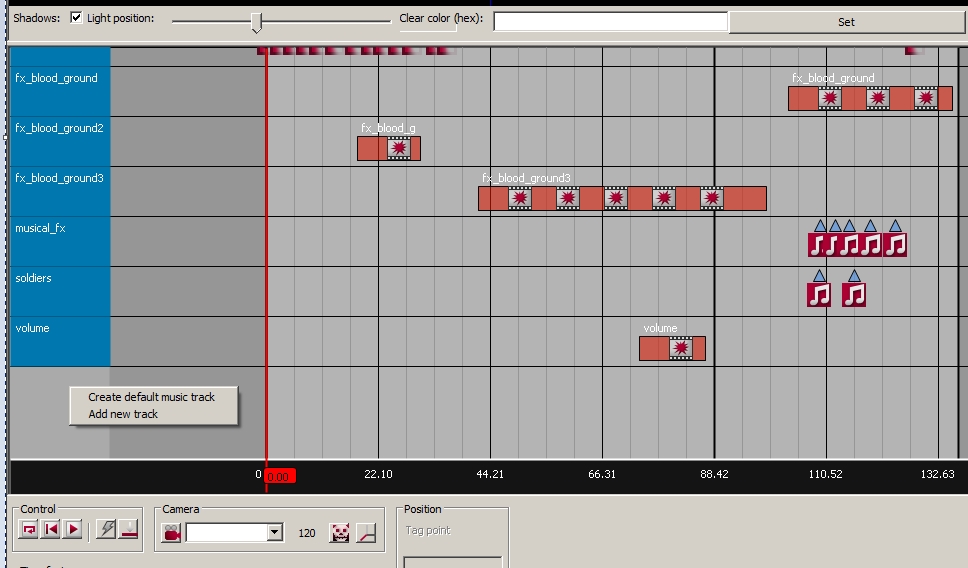
If you would like to add special music for particular cutscene, open cutscene editor and in timeline area right click and select Create default music track:
Then right click on Music track and select Add music event. Double click that event to open its properties:

eventName - name your event. In our case, this is Start music.
startTime - when music event will be triggered. 0 stands for 00:00 (ss:ms), which is begining of the cutscene. Time is expressed in seconds.
cue - enter cue’s name you want to play in your cutscene. This name has to be the same as the corresponding cue’s name in FMOD. For our case we picked cs0_regicide, cutscene from TW2’s Prologue.
volume - set volume of music played in your cutscene. 0 is the maximum (loudest), -60 is the lowest (music is muted). When - during playback of music - music event with volume=-60 is triggered, music will be faded out in the time interval specified in particular cue’s properties in FMOD (see FMODTV tutorial video linked above for more).
Here’s another music event from the same cutscene:
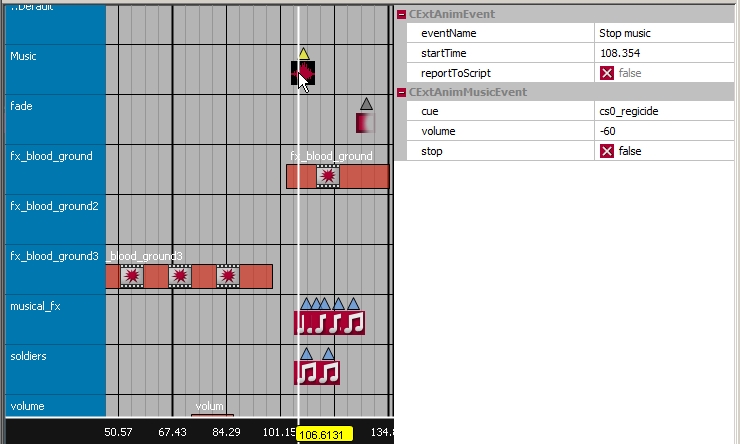
This is a Stop music event, so it’s startTime is exactly where we want music to fade out. Cue name remains the same as in our Start music event. Volume is set to -60 (fade out to silence).
Scoring dialogs
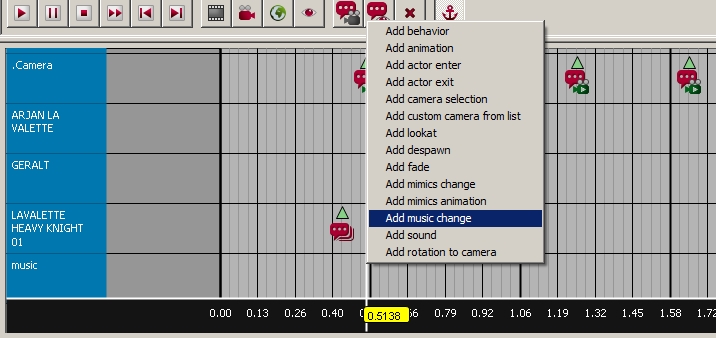
Dialogs can be scored exactly as cutscenes. Do add music change during dialog scene, open dialog editor, open your dialog and switch to Directors layout (menu View -> Directors layout). Right click on dialog’s timeline and select Add new track. Enter track’s name (i.e. music). Now, right click on music track and select Add music change:
Now, set event’s properties:
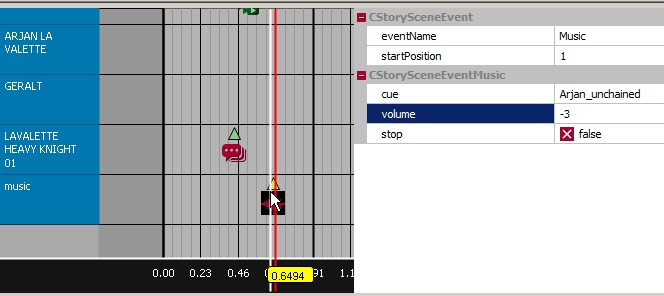
eventName - name yout event.
startPosition - when music event will be triggered. 0 stands for 00:00 (ss:ms), which is begining of the dialog. Time is expressed in seconds.
cue - enter cue’s name you want to play in your dialog. This name has to be the same as the corresponding cue’s name in FMOD. For our case we picked Arjan_unchained.
volume - set volume of music played in your cutscene. 0 is the maximum (loudest), -60 is the lowest (music is muted). When - during playback of music - music event with volume=-60 is triggered, music will be faded out in the time interval specified in particular cue’s properties in FMOD (see FMODTV tutorial video linked above for more).
Scoring quests
During quests you can control music behavior by using special quest blocks. These blocks (in general) work the same as other regular, not related to music, blocks. Those blocks are called CQuestScriptBlock:
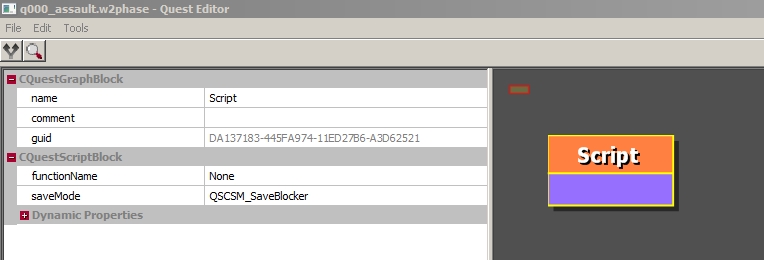
By selecting proper functionName you define block’s behavior. For controlling music playback, choose from:
QPlayMusic
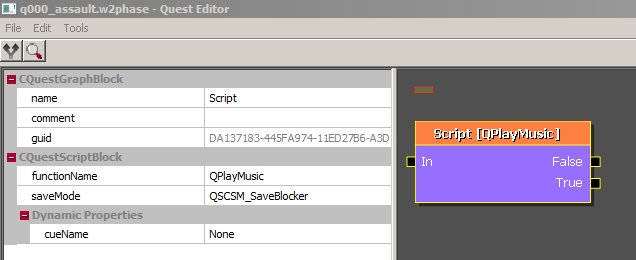
This quest block will trigger play command to any cue you’ll link with this block. In cueName type cue’s name you want to be triggered when this block is called. Any fade or crossfade between this new cue and existing one is defined in cue’s theme properties in FMOD.
QStopMusic
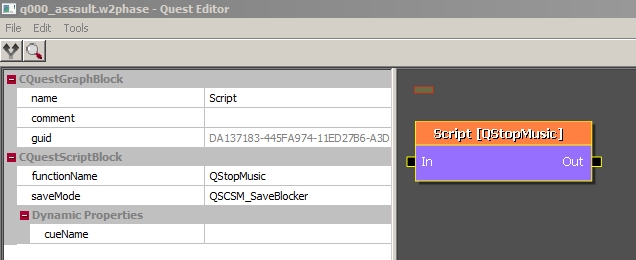
This block will stop playing particular cue. in cueName type name of the cue you’d like to stop. Cue’s fade out time can be adjusted in cue’s theme properties in FMOD.
QBlockCombatMusic
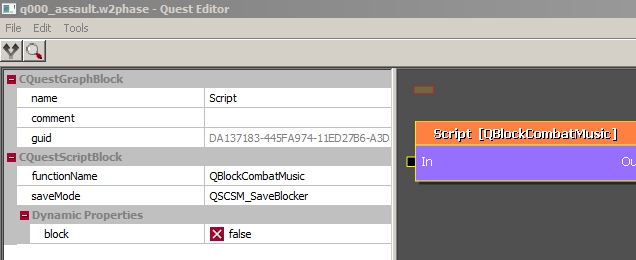
This block will block playback of any combat cue defined in level’s World Properties. Just check the block checkbox to true (yes, please block combat music) or false (stop blocking combat music). This quest block is useful in all custom combat situations, when regular combat music used on entire level don’t match - for example in boss fights.
Going deeper - using parameters
When designing music behavior in the game, you can take advantage of parameters. To understand what parameters are, please read FMOD’s manual, go to FMOD’s wiki or just watch FMODTV’s music tutorials.
In REDkit there are two already defined parameters you can use to create more complex music system in the game. Please remember that in order to keep them working properly, those parameters should be configured in your FMOD music project. These parameters are:
time_change
This parameter is used to play different music during day and night. For example, you might want to have a village which is really peaceful and quiet at night, and noisy during daytime. This parameter will help you set that. time_change should have range between 1.00 and 24.00:
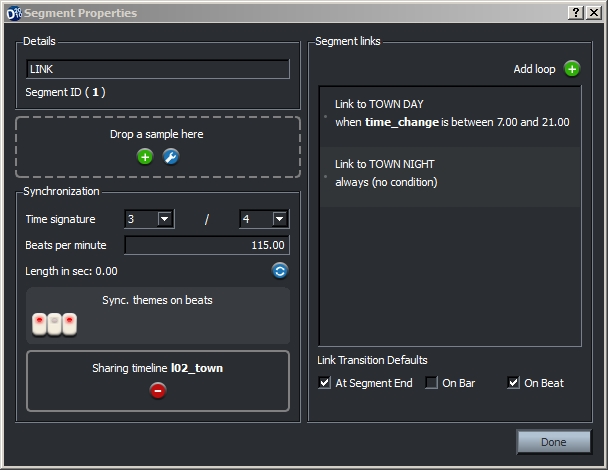
In theme’s editor, you can set link conditions, when music will change:
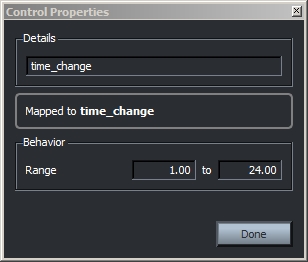
In our example we created link to TOWN DAY segment, and this link will only work when time_change value is between 7.00 and 21.00 - perfect for us, since we want to have daytime music in our village between 7AM and 9PM. In all other cases (so before 7AM and after 9PM) FMOD will play TOWN NIGHT segment.
enemy_cnt
This parameter works exactly the same as time change. You have to set up parameter’s range (in our case that would be 1 to 5) and then set up proper link conditions in your combat themes:
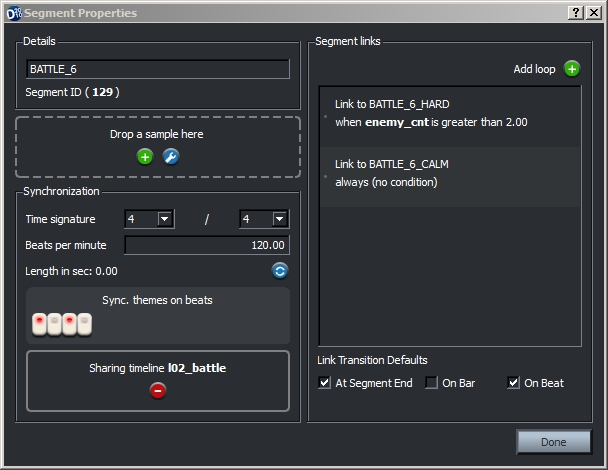
In our case FMOD will play hard version of our combat cue every time when there are more than two enemies near player (enemy_cnt set to greater than 2.00). In all other cases (so - less than two enemies) FMOD will play calm version of our combat cue.
Final touches - music volume
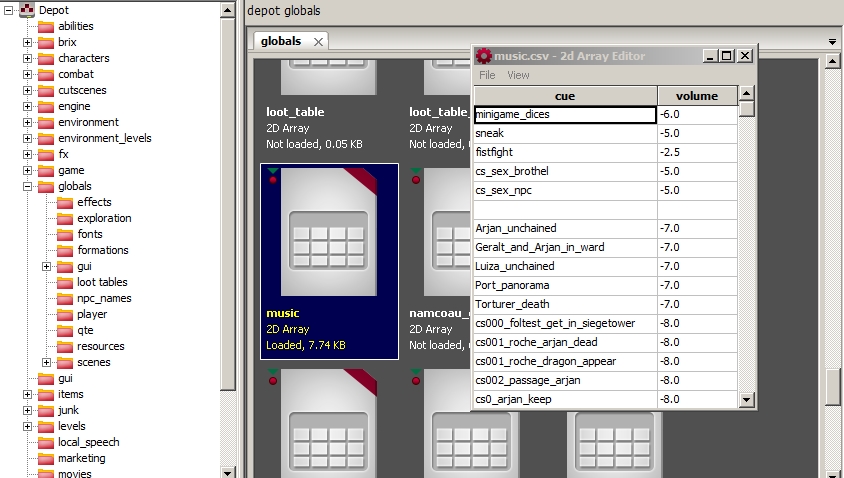
To control volume of your music, you have to edit music.csv file, located in data/globals. It is a table with all cues created in FMOD, written down with corresponding volume levels:
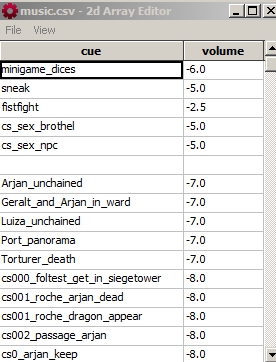
Volume is expressed in dBFS (Decibels relative to full scale). 0 is the maximum value (play cue at max volume).
This is a logarithmic scale), so value -6 dBFS would play music at its 50% volume.
Remember that each time you create new cues in FMOD (and build them into banks), you’ll have to enter manually new cues to this table. If you don’t do this, music will still play, but you will not have any control of volume fo those new cues.
DO NOT OPEN this file form Windows Explorer (i.e. with Notepad or other text editor) - this will cause file to break. The right way to open and edit this file is from REDKit’s Asset Browser - open Asset Browser and navigate to folder globals. There you will find music.csv file: