
Image below shows what we want to achieve - a corridor with 3 different covers for the player. This is only an example of basic stealth level created for the tutorial purposes.

At this point, I assume that you already have your stealth level prepared.
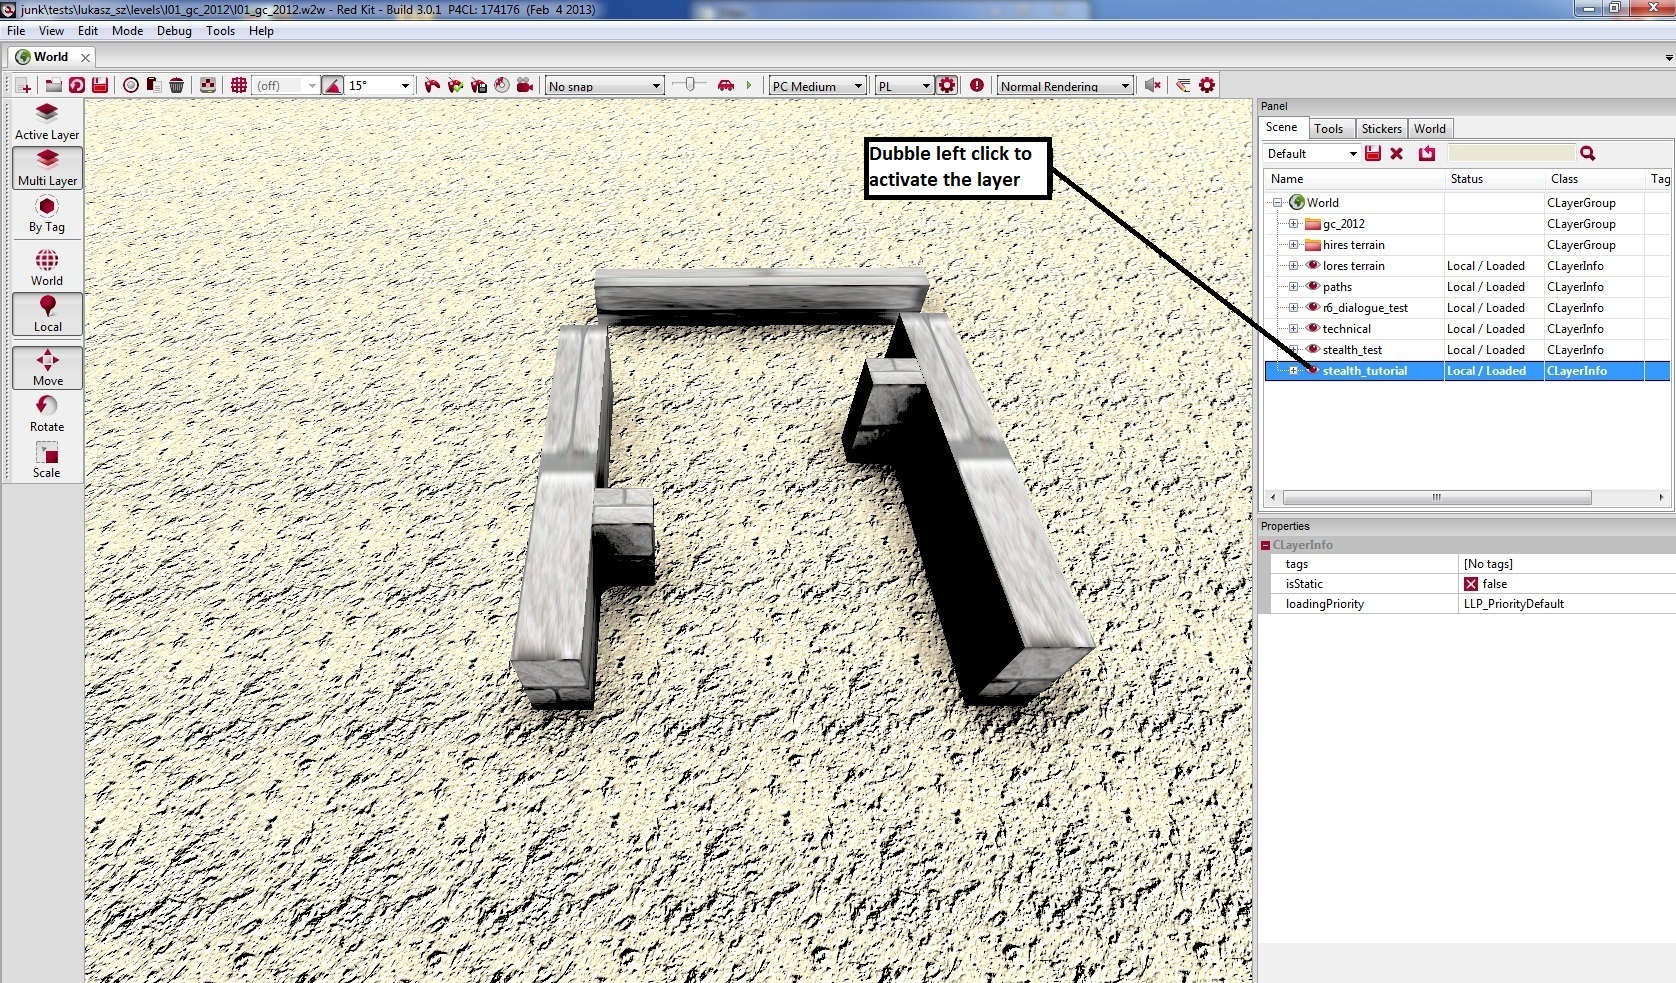
To start placing stealth system elements on the level, you must activate a proper layer - the one you want to have stealth objects placed on. Active layer is marked with bold font. Check image below to see how to activate layer:
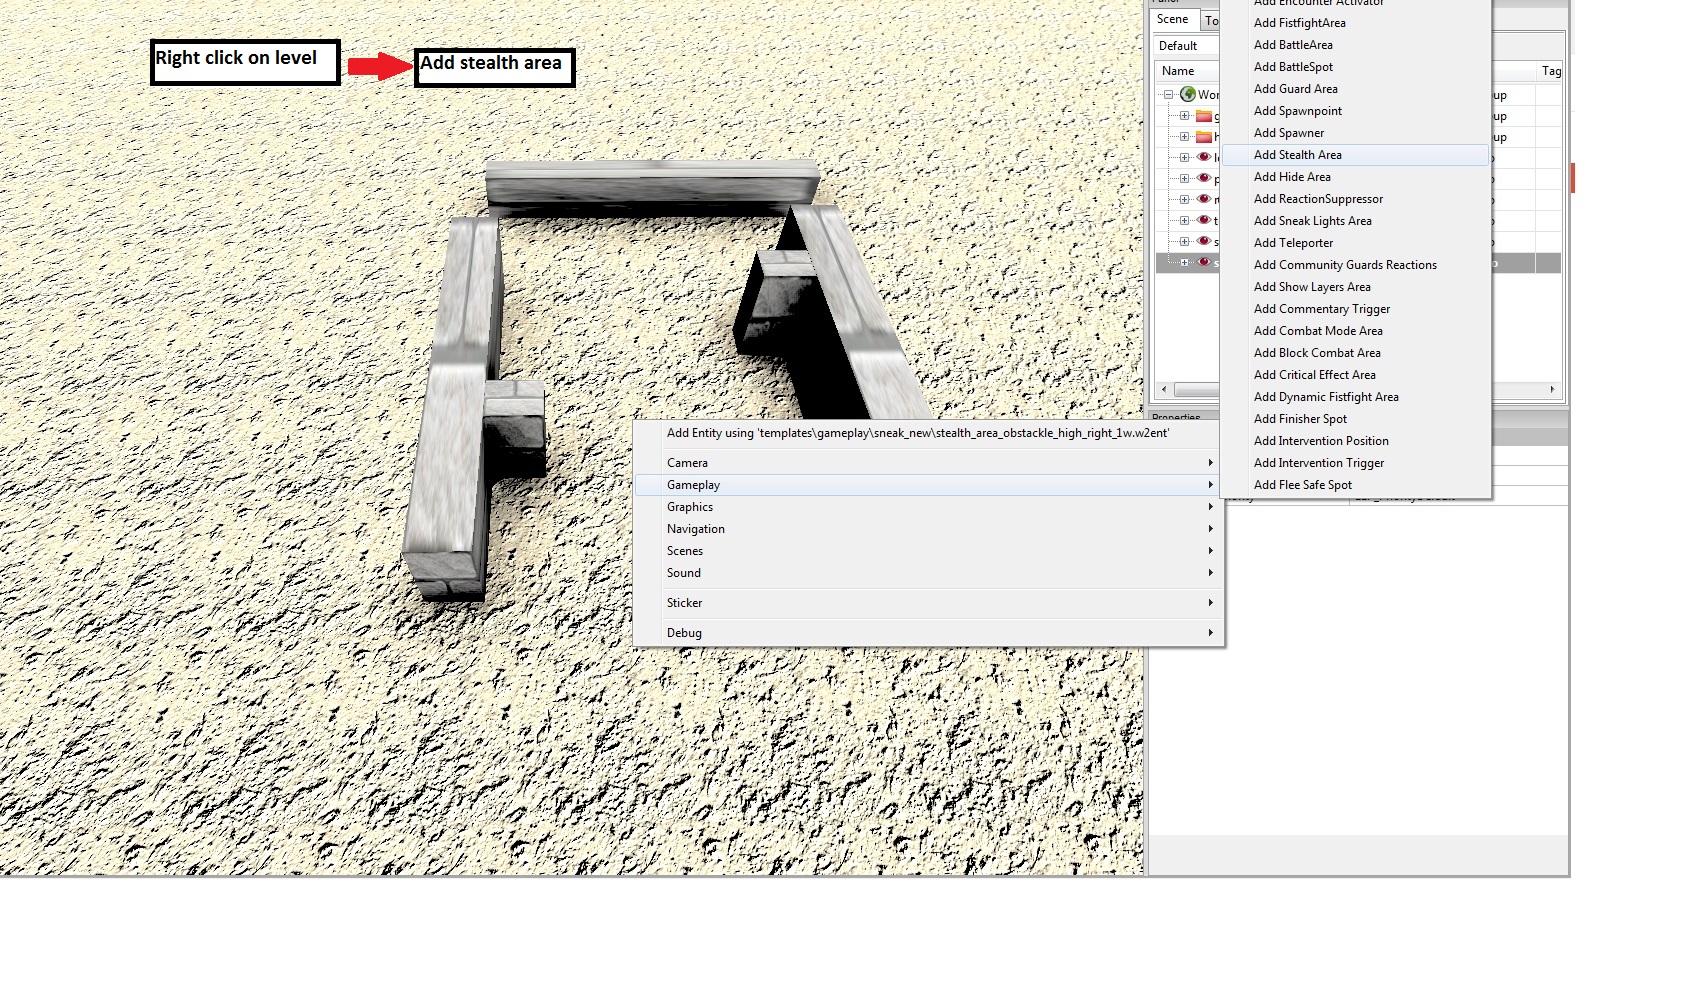
If you played The Witcher 2, you already know that stealth was available only in some areas. So first of all we need to create stealth area to indicate where on the level player should enter stealth mode.
It’s simple. Right click on the level in the middle of a place you want to have your stealth area (remember to have your layer active!). It will open objects window. Objects are filtered by type. Choose Gameplay
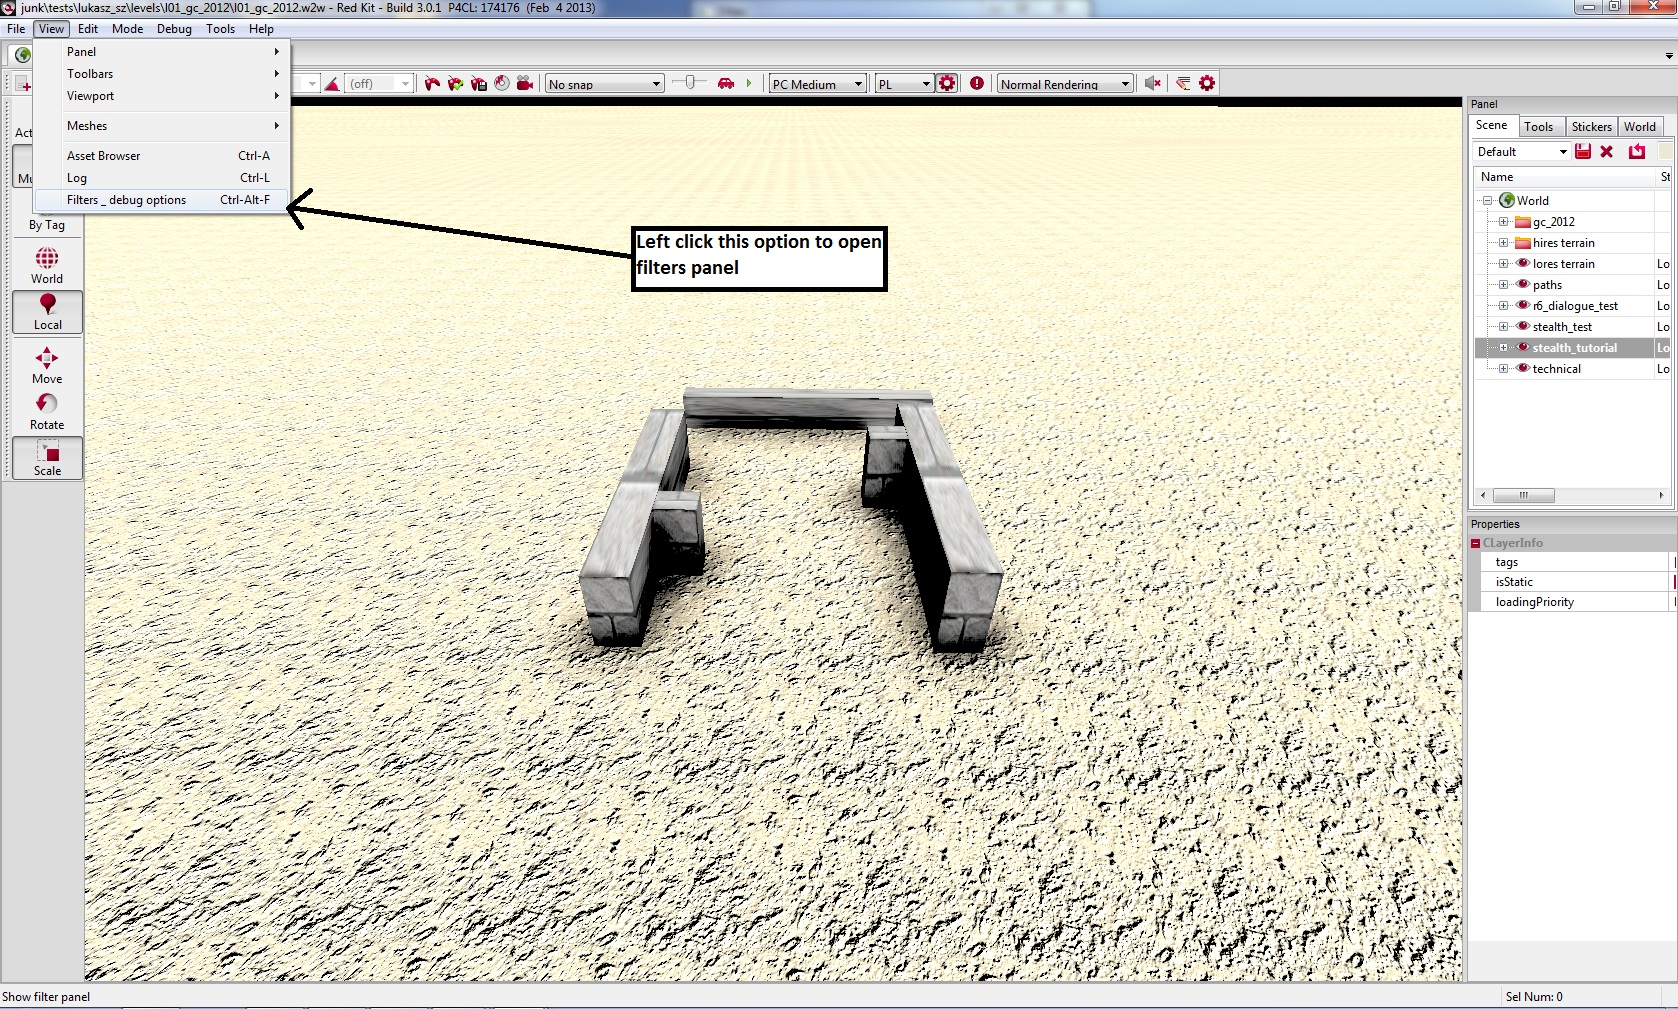
Hmm.... nothing happened. No new objects on the level. If you have the same problem, it means that editor filter responsible for displaying volumes is not set. To set it, select View on the toolbar and choose View
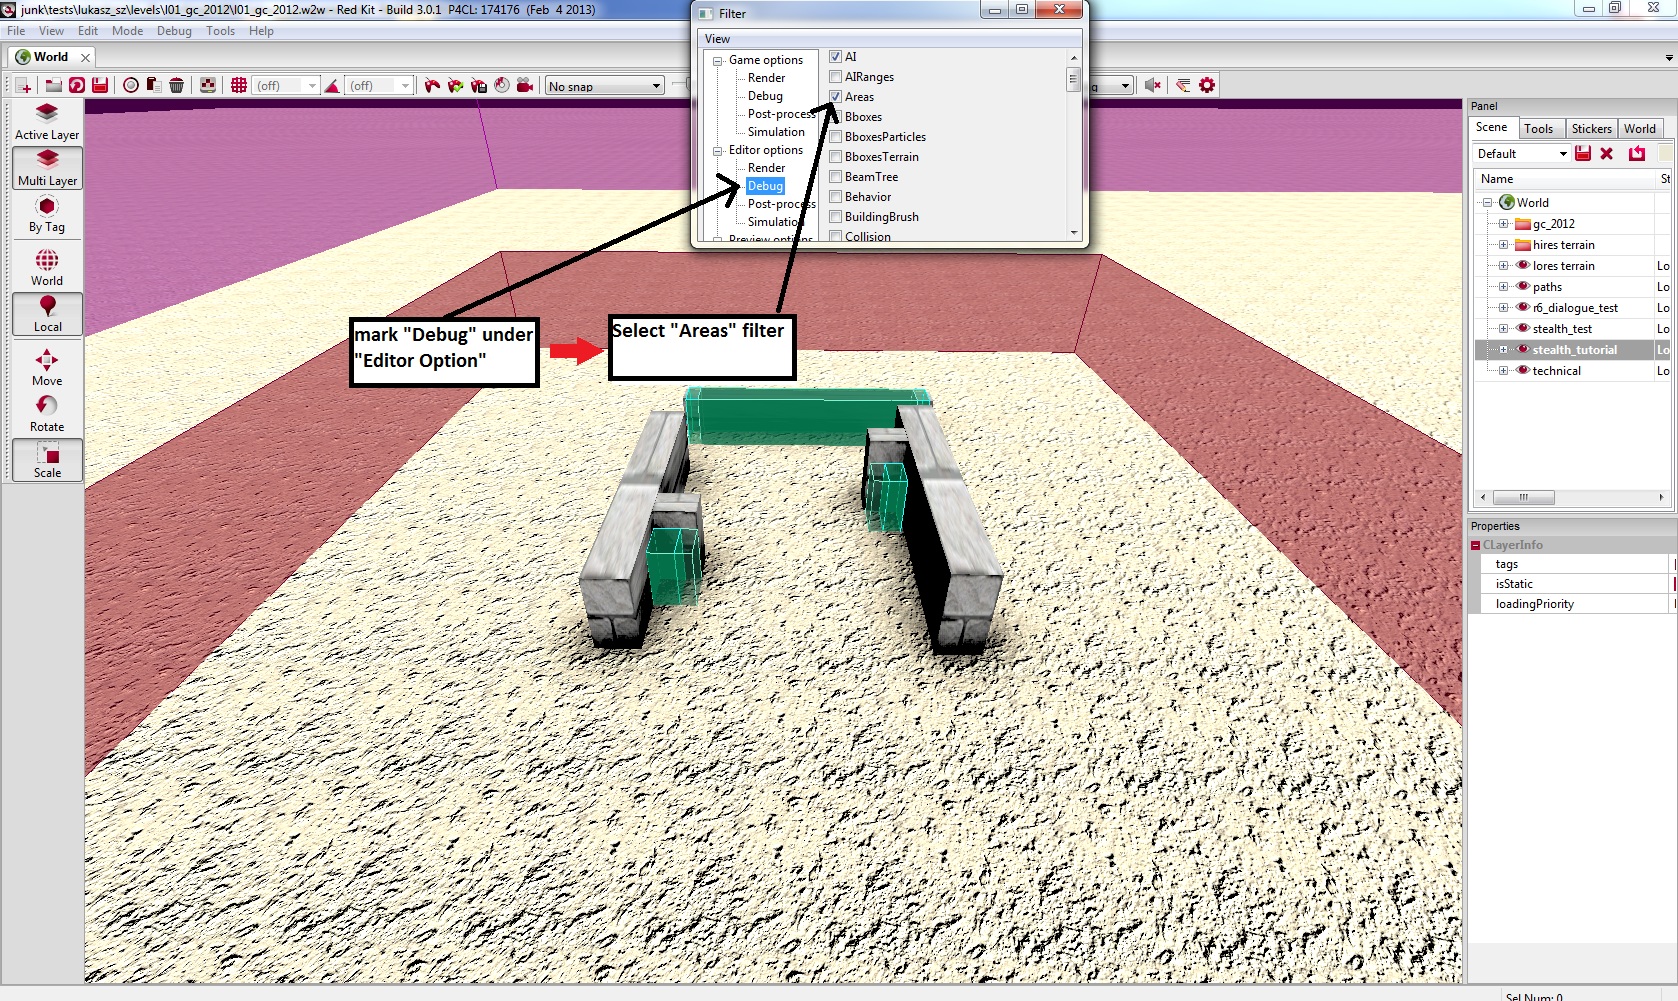
After opening Filters window mark debug under editor options and select Areas. From this point forward you will be able to see volumes on the level. Check image below for the details:
Stealth Area you’ve just put on the level has a default size. It’s too small. We need to make it bigger in order to cover the area where stealth mode suppose to work.
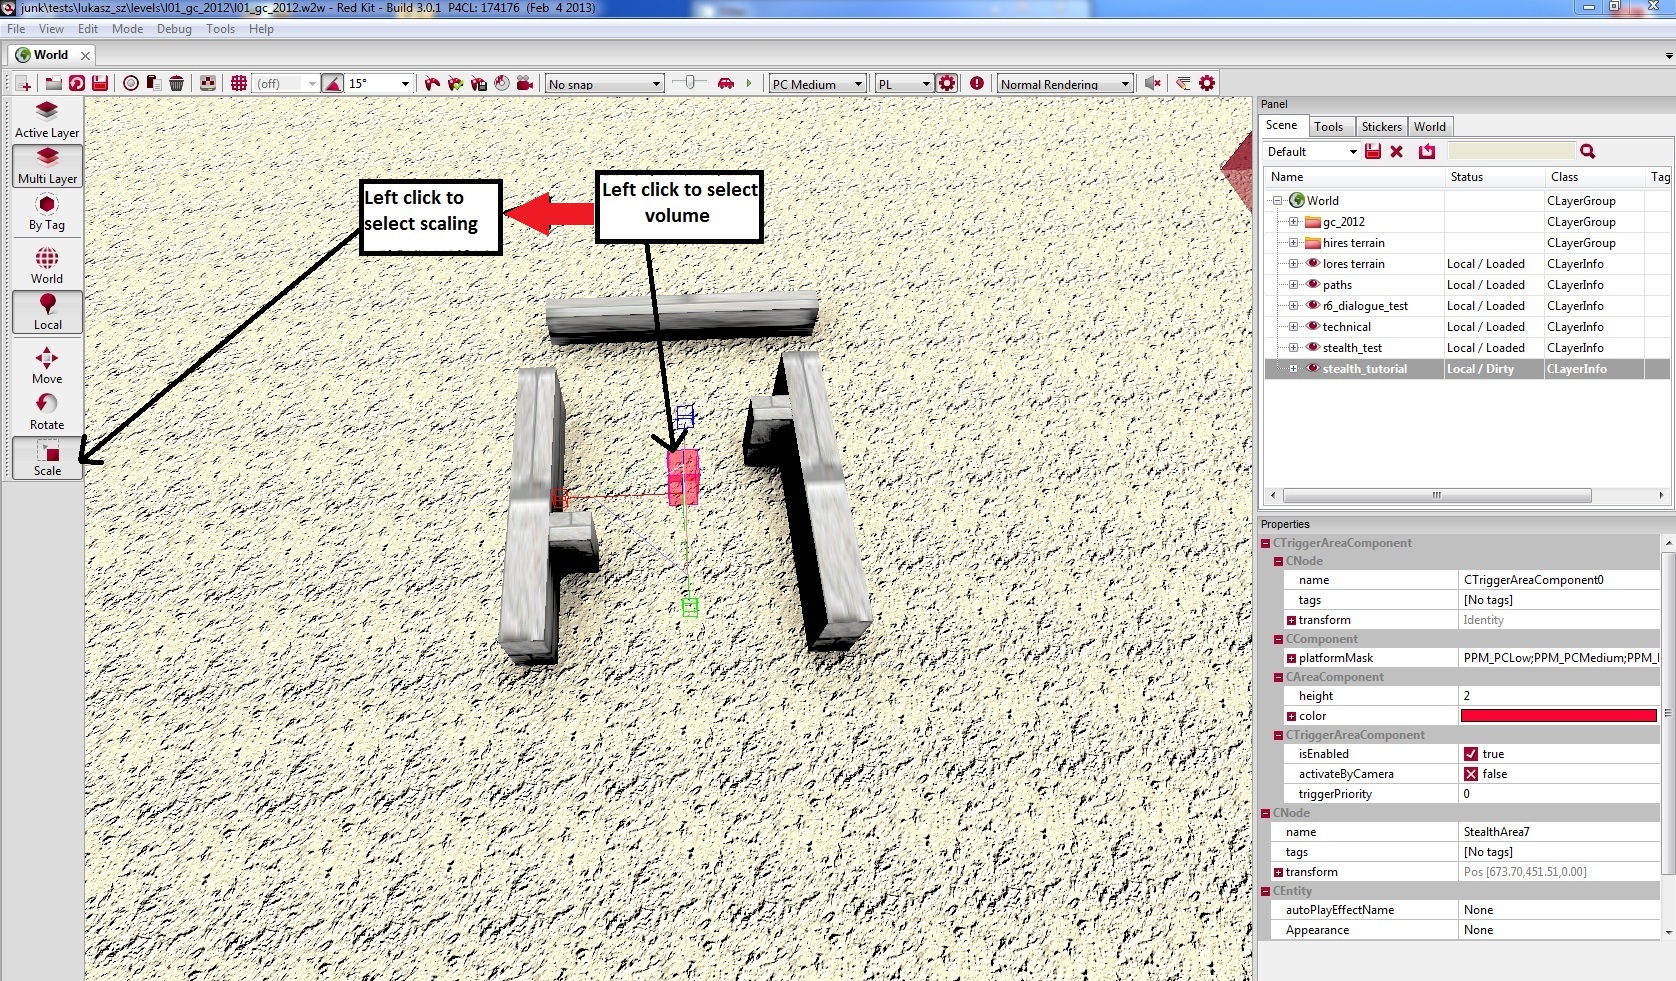
To do it, first off all, you need to select Stealth Area volume on the level by left clicking on it. Then you need to mark Scale button on the left side bar also by left clicking on it. Now use scale gizmo to make the volume bigger. You can do it by holding left mouse button on gizmo and moving your mouse cursor gently (holding gizmo in the middle will scale object evenly, holding one axis will scale object in this axis only). Check image below for the details:
After performing scaling operation, Stealth Area volume should look more or less like on the image below.
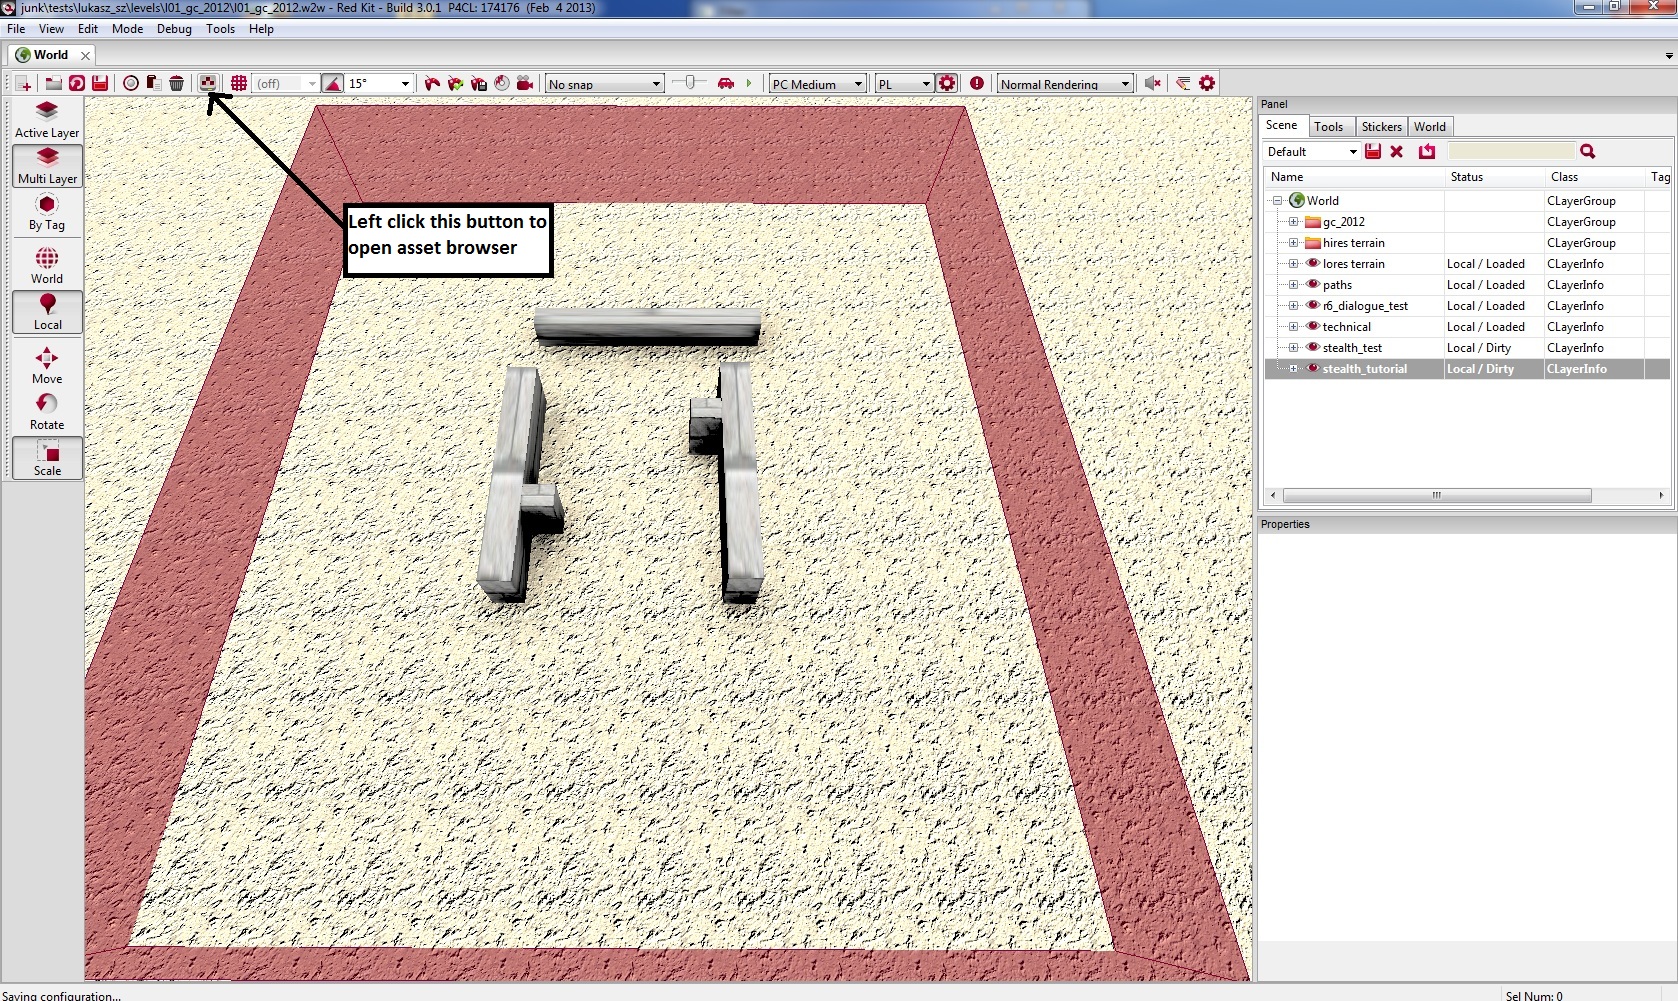
We have Stealth Area properly set on the level. We are still missing some covers where player could hide himself. To add covers we need to find them in the asset browser. To open it, left click on the asset browser button on the top bar. Check image below for the details:
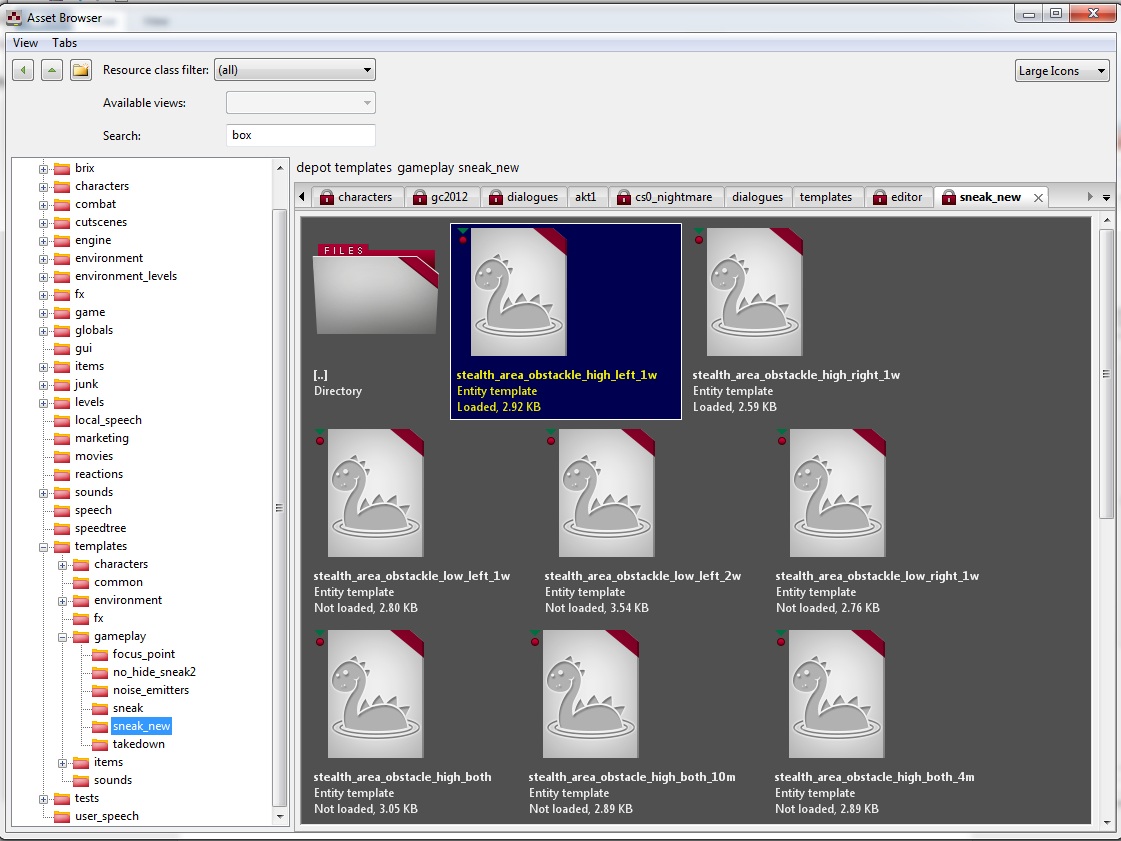
You can find Covers here: depot/templates/gameplay/sneak_new. Image below shows contents of the folder. There are different kinds of covers suitable for different spots on the level. You can place covers on the level just by Drag & Drop (remember to have your layer active!).
For the purpose of this tutorial we will use 3 types of covers: high left, high right and low. All covers are represented on level as volumes. Mechanics behind it are very simple – when player enters the volume he starts using the cover. Challenge for you is to place cover in a correct spot so it will match corresponding obstacle. Remember that cover volumes should not be scaled! Otherwise cover animation might not fit! Check image below for the details:
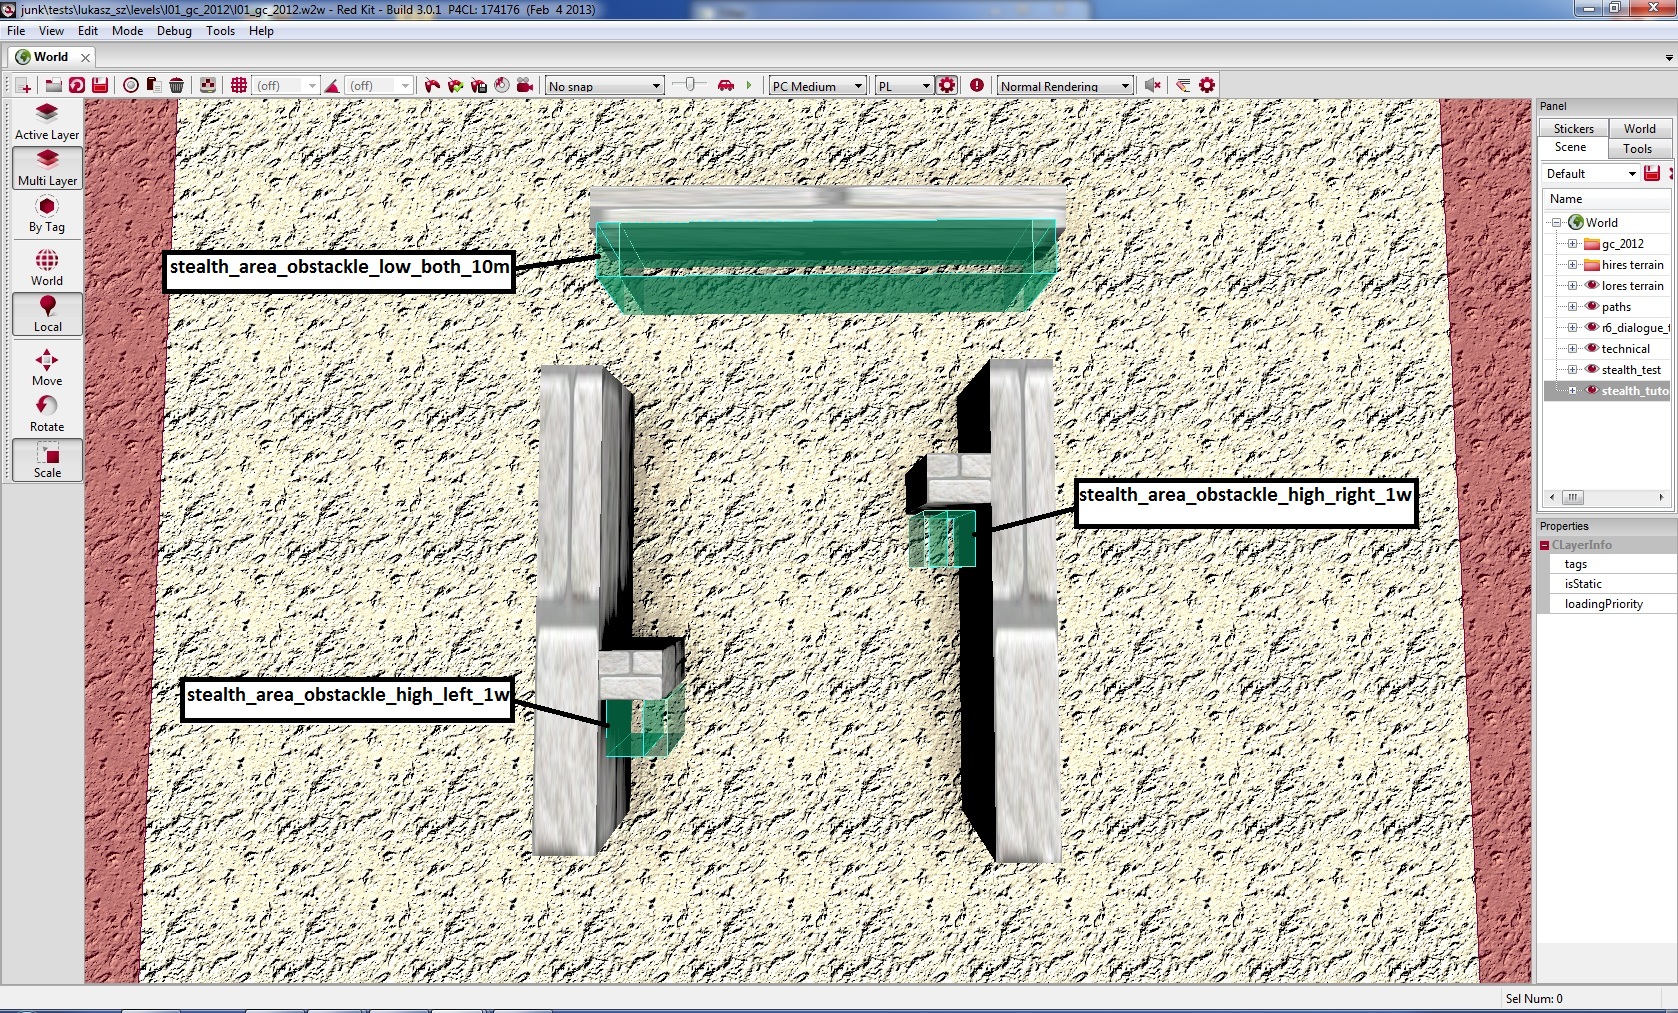
If everything was set correctly player should behave in the covers exactly like in the images shown below:
1. stealth_area_obstackle_high_left_1w
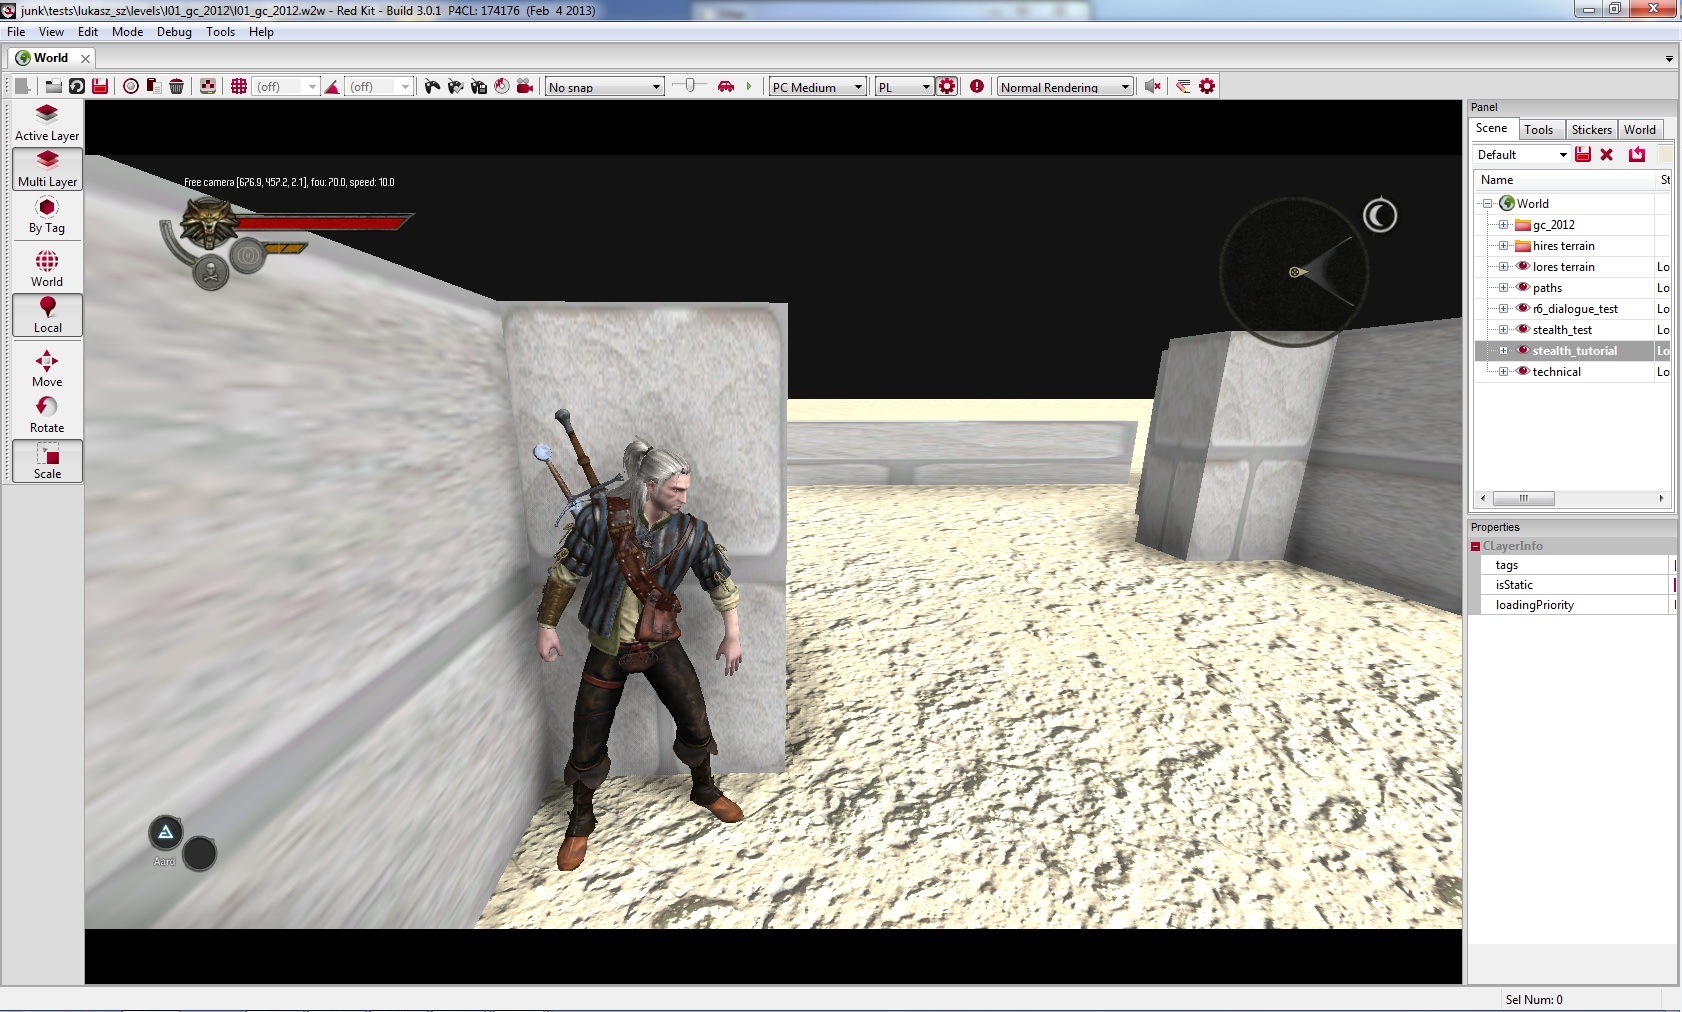
2. stealth_area_obstackle_high_right_1w
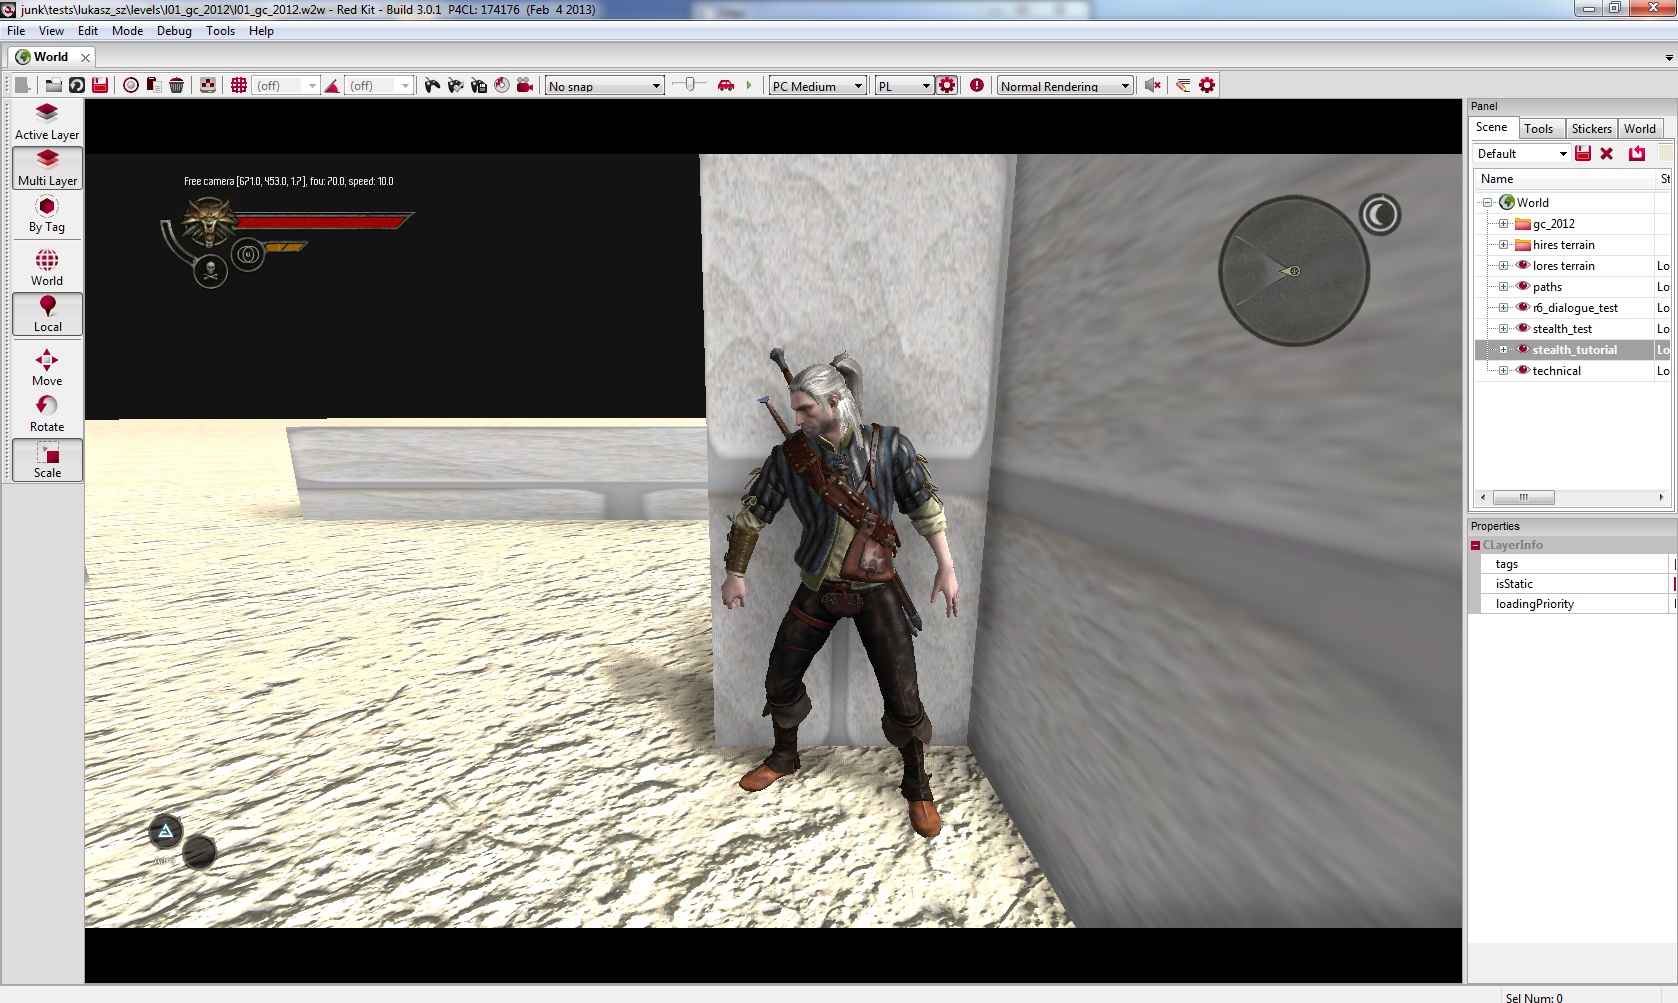
3. stealth_area_obstackle_low_both_10m
