
The terrain tools can be found on the right-panel of the Editor, under the Tools subpanel.
NOTE: Use shift to achieve the opposite of some of the effects.
SetScaleBiased:
It levels the terrain to previously set height - from 0
Flatten:
Sets terrain to a defined height, with rounded edges and a flat top surface (cleaner than SetScaleBiased).
The brush's depth gauge (red or green line) reveals how much higher or lower than the current land the terrain will become.
Slope:
This bruch has a degree of incline set in its parameter to build a continuous ramp via clicking and dragging.
NOTE: with a slope of zero this is an effective flattening tool.

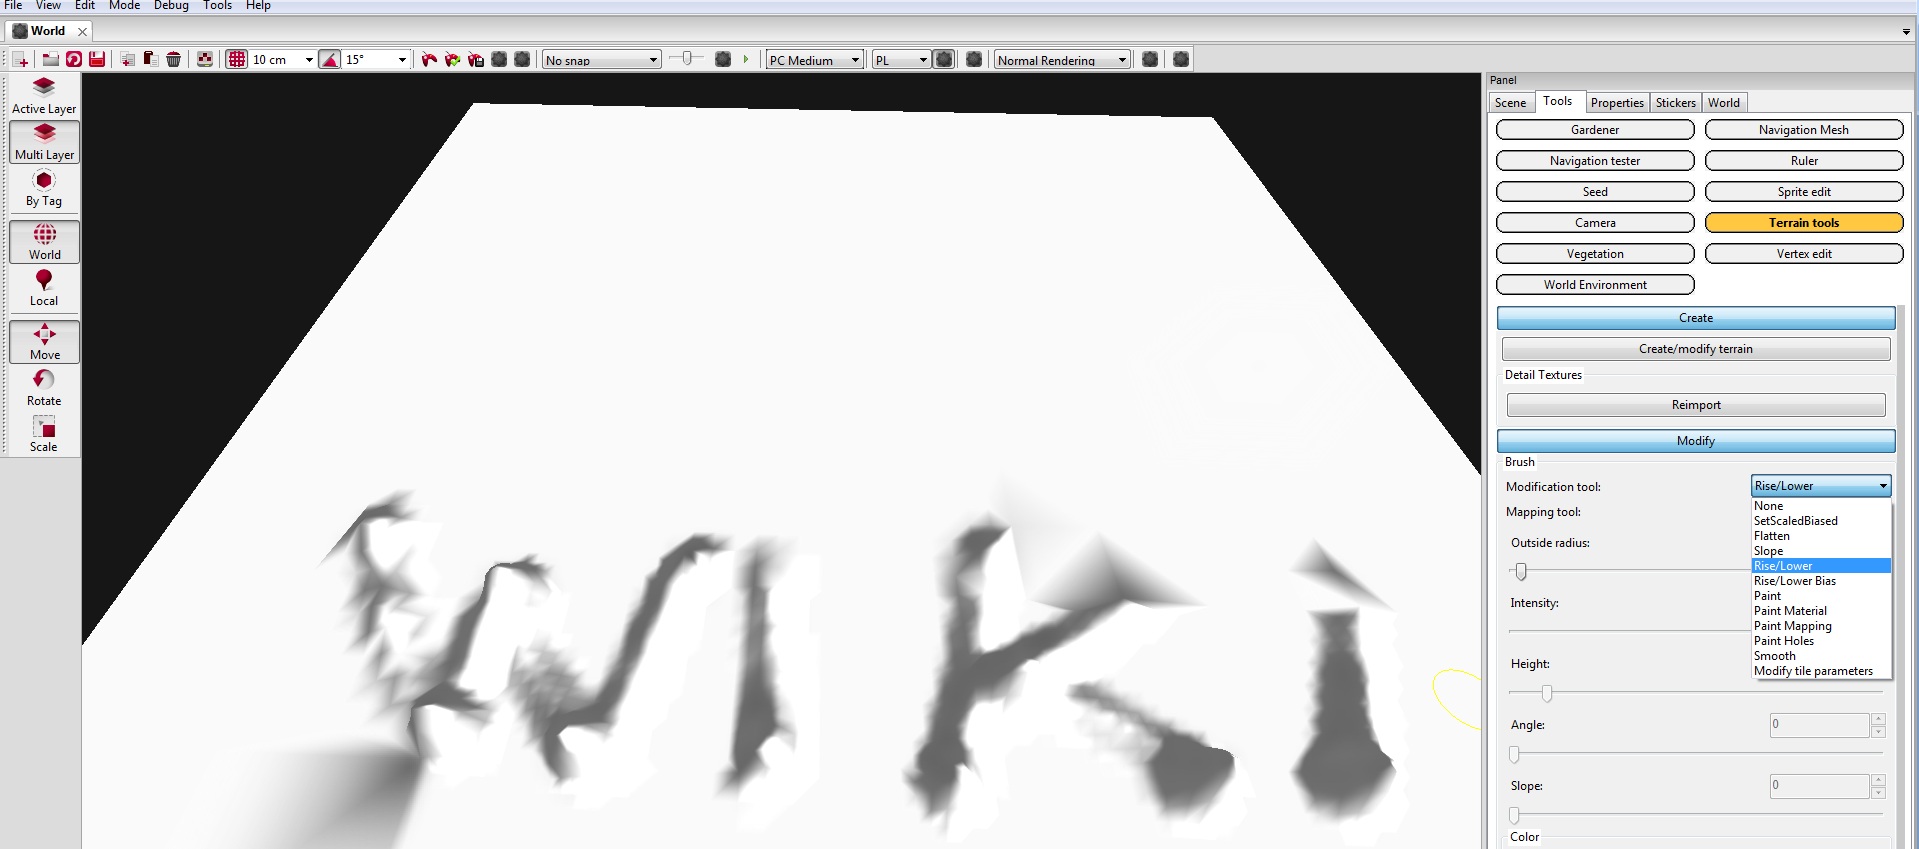
Rise/Lower:
Raises terrain to a tapered point.
NOTE: Shift click lowers.

Rise/Lower Bias:
Raises or lowers terrain to a certain value (DOES NOT WORK in the REDkit Beta).
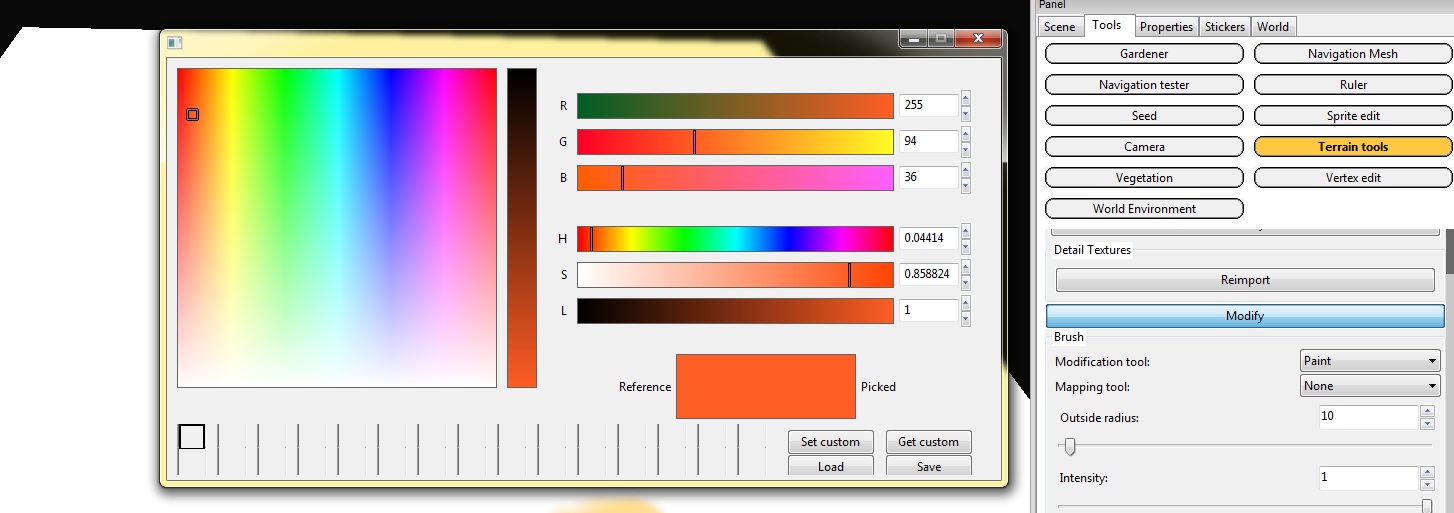
Paint:
Paints terrain color, which affects the textures underneath.
Paint Material:
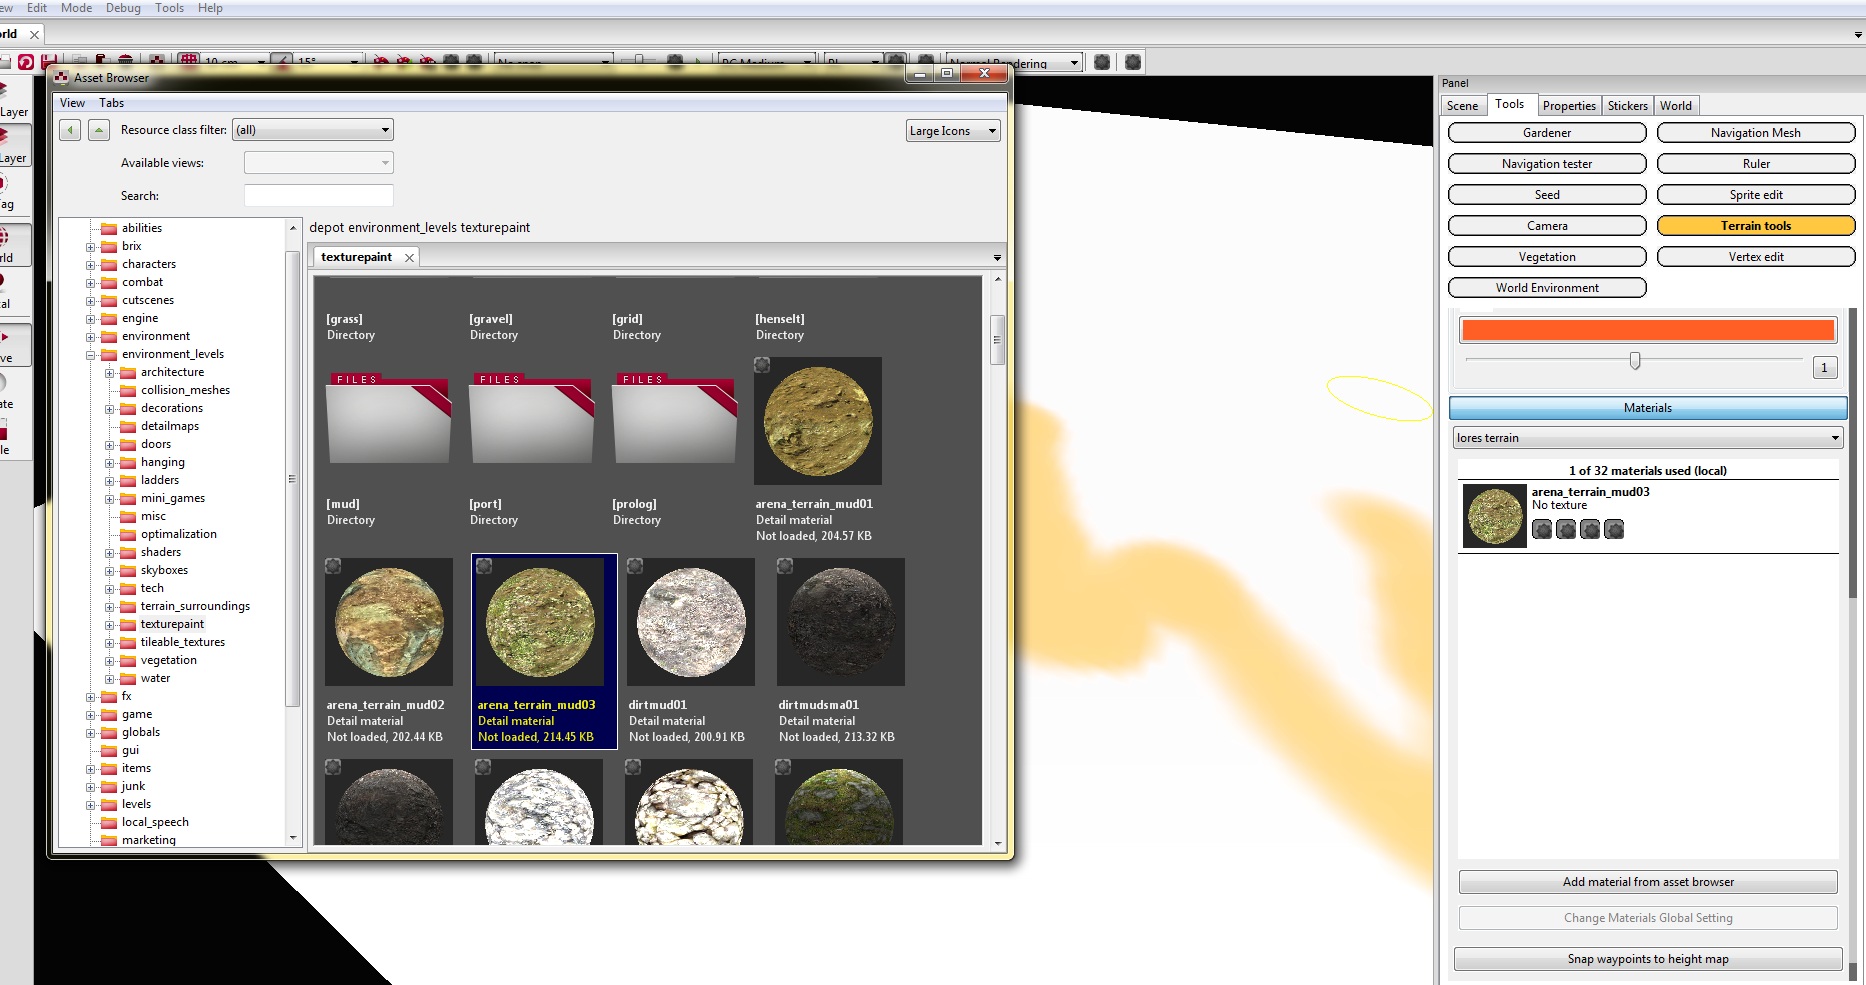
A selected Detail Material from the Asset Browser (environment_levels > texturepaint > choose a "Detail Material") is applied to the terrain tile.
1). Click the Materials button inside the Terrain Tools panel.
2). Click the "Add material from asset browser" button.
Your material from the texturepaint folder will be loaded.
NOTE: BE SURE to repeat this process for "tile 000x000" which is located in the drop-down menu that currently says "lores terrain".
Paint Mapping:
Useful to realign textures along different axis, especially when the terrain has stretched textures (see pictures below)
The default is XY mapping. Select "Paint YZ" or "Paint XZ" from the Mapping Tool drop-down menu and use the brush carefully.


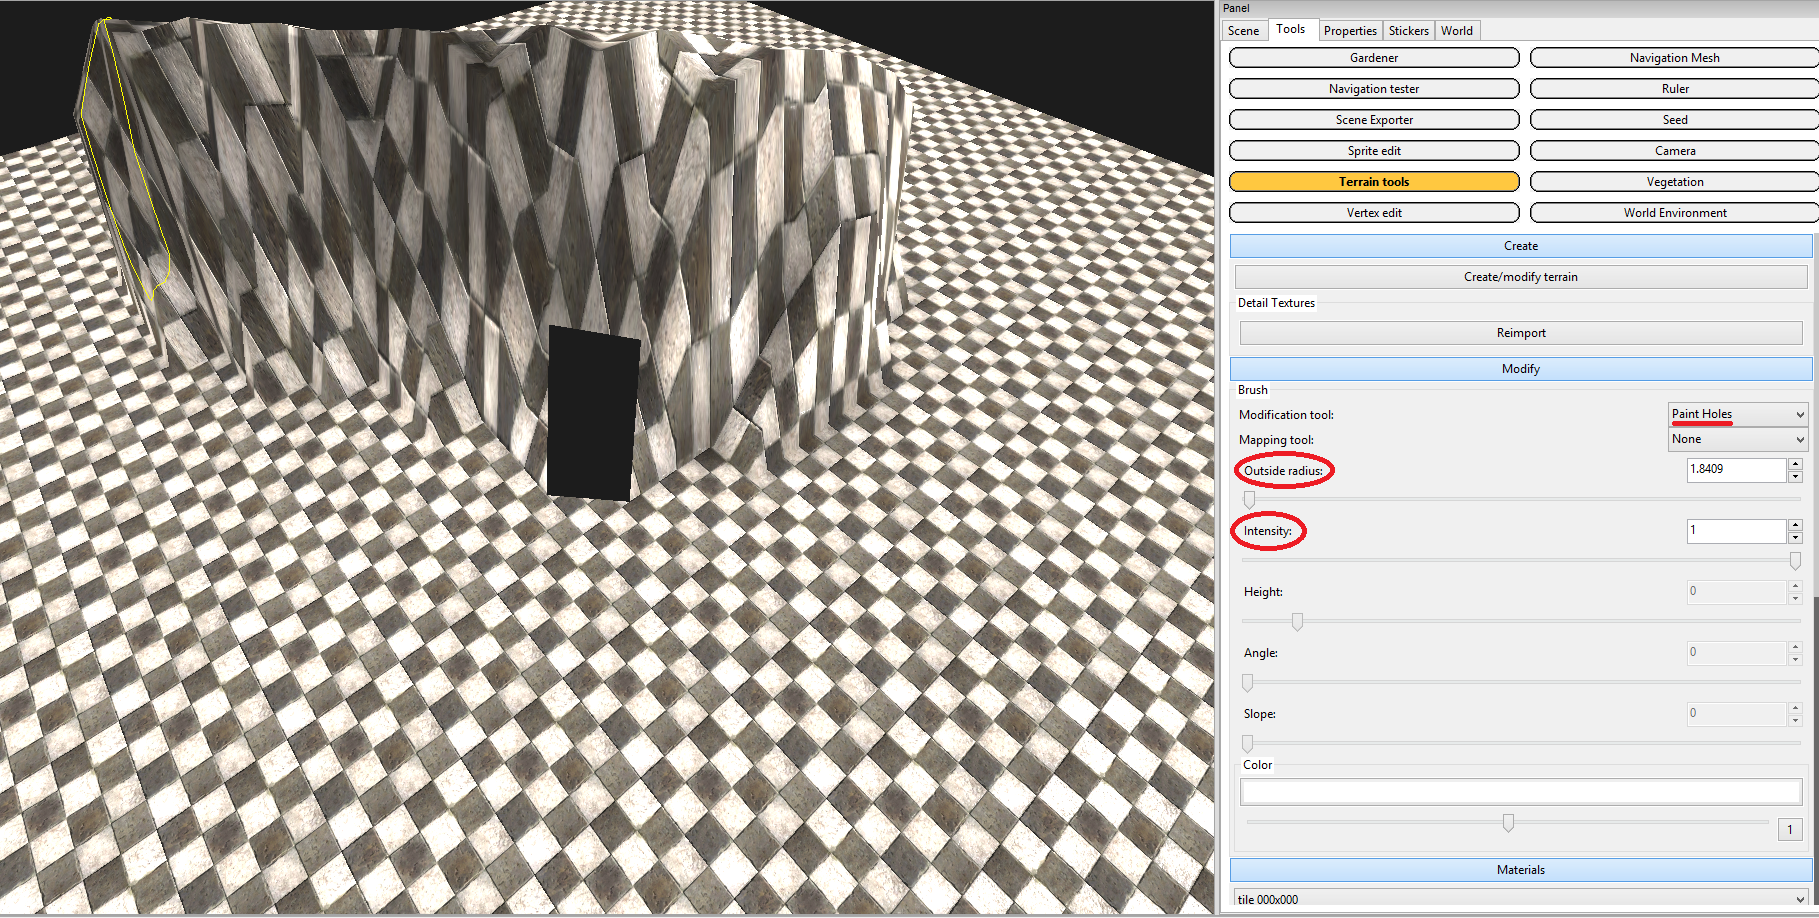
Paint Holes:
Cuts a hole in the terrain tile.
NOTE: useful to create an entrance to a cave.
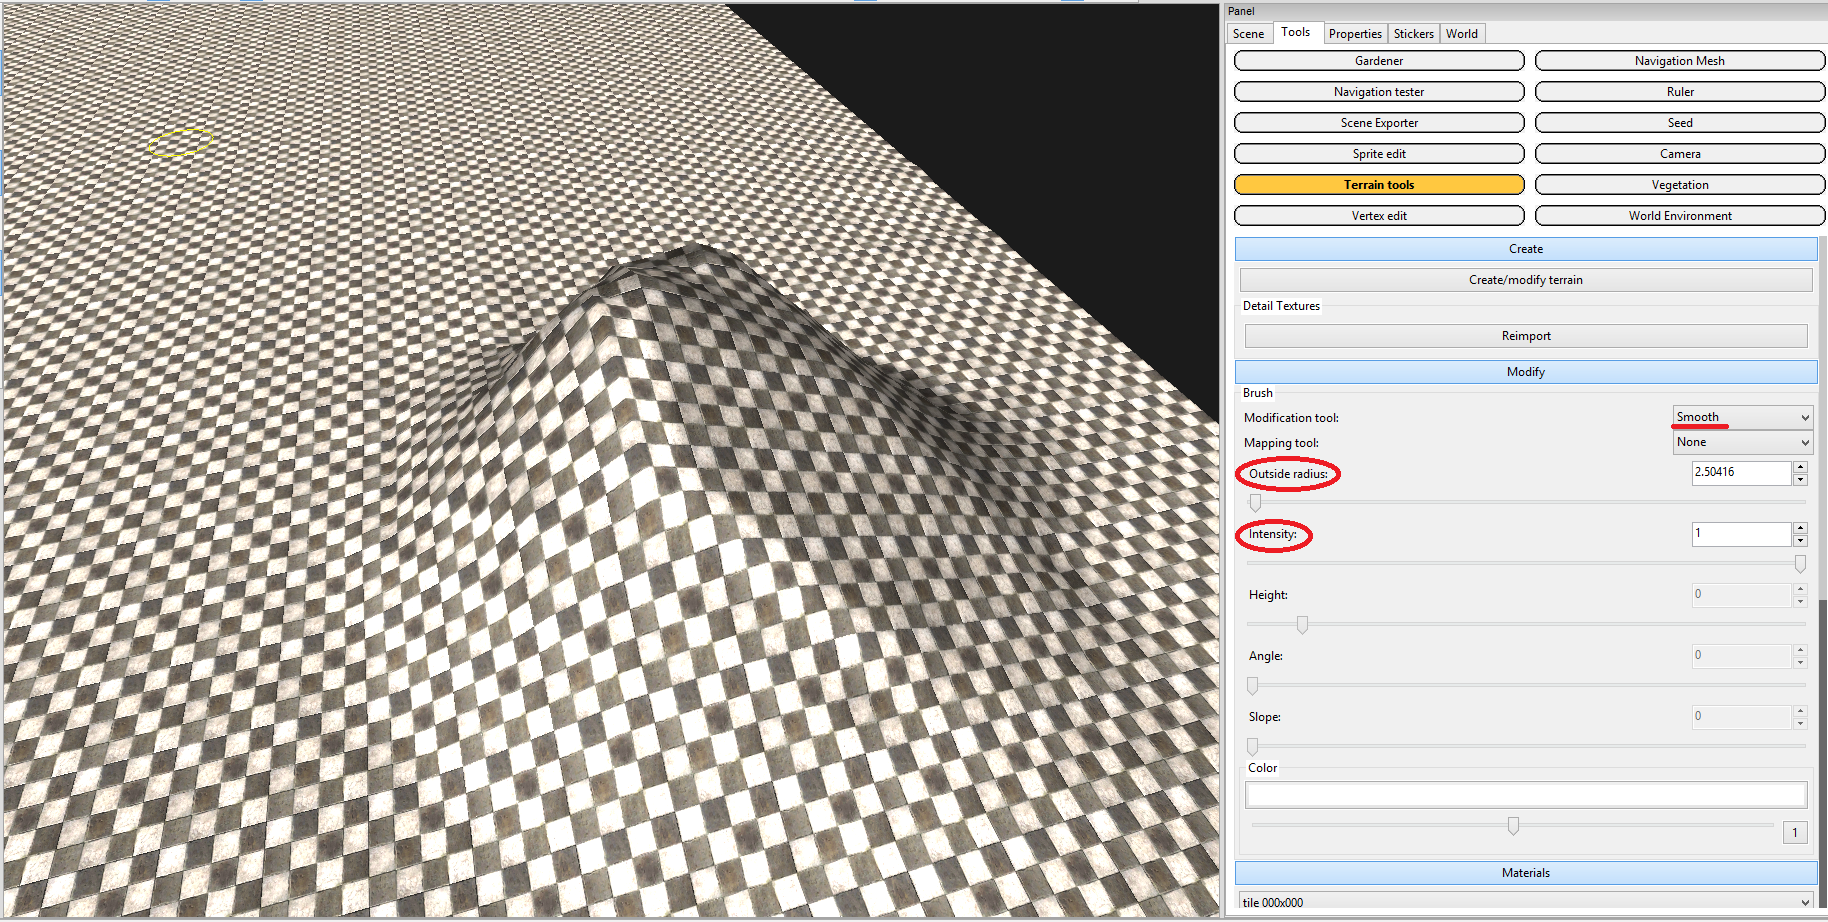
Smooth:
Smoothes over sharp terrain.
NOTE: Shift+click will produce new results (it's not a reversal but has its own characteristics).
Modify Tile Parameters:
Open the dialog window for changing the the resolution and size parameters for the terrain tile. Useful for increasing the resolution of the Mask Map to improve detailed texture painting such as footpaths.
1. In the Tools/Terrain Tools tab find Modify.
2. From Modification Tool select Rise/Lower.
3. Click on any area to rise the terrain. Hold Shift and click to lower the terrain.
4. If you want to flatten the terrain select Flatten in Modification Tool.
5. Click on one of the hills and move the mouse to flatten it.
1. In Tools/Terrain Tools panel find Brush section.
2. From Modification Tool menu select Paint.
3. Choose colour from the palette at he bottom of the panel (you don't have to confirm the selection).
4. Click on the terrain to colour it.
1. Open Asset Browser and go to environment_levels\texturepaint\
2. Highlight a texture file (must be DETAIL MATERIAL type).
3. In editor panel, go to Tools>Terrain Tools tab.
4. Set Modification Tool to Paint Material.
5. Scroll to the lower part, Materials section. Choose "lores terrain".
6. Below the whitespace click "Add material from asset browser". You will see your Detail Material appear in the whitespace.
7. Change the chosen position from "lores terrain" to "tile 000x000". Repeat step 6. The terrain tile will now be covered in your chosed texture.
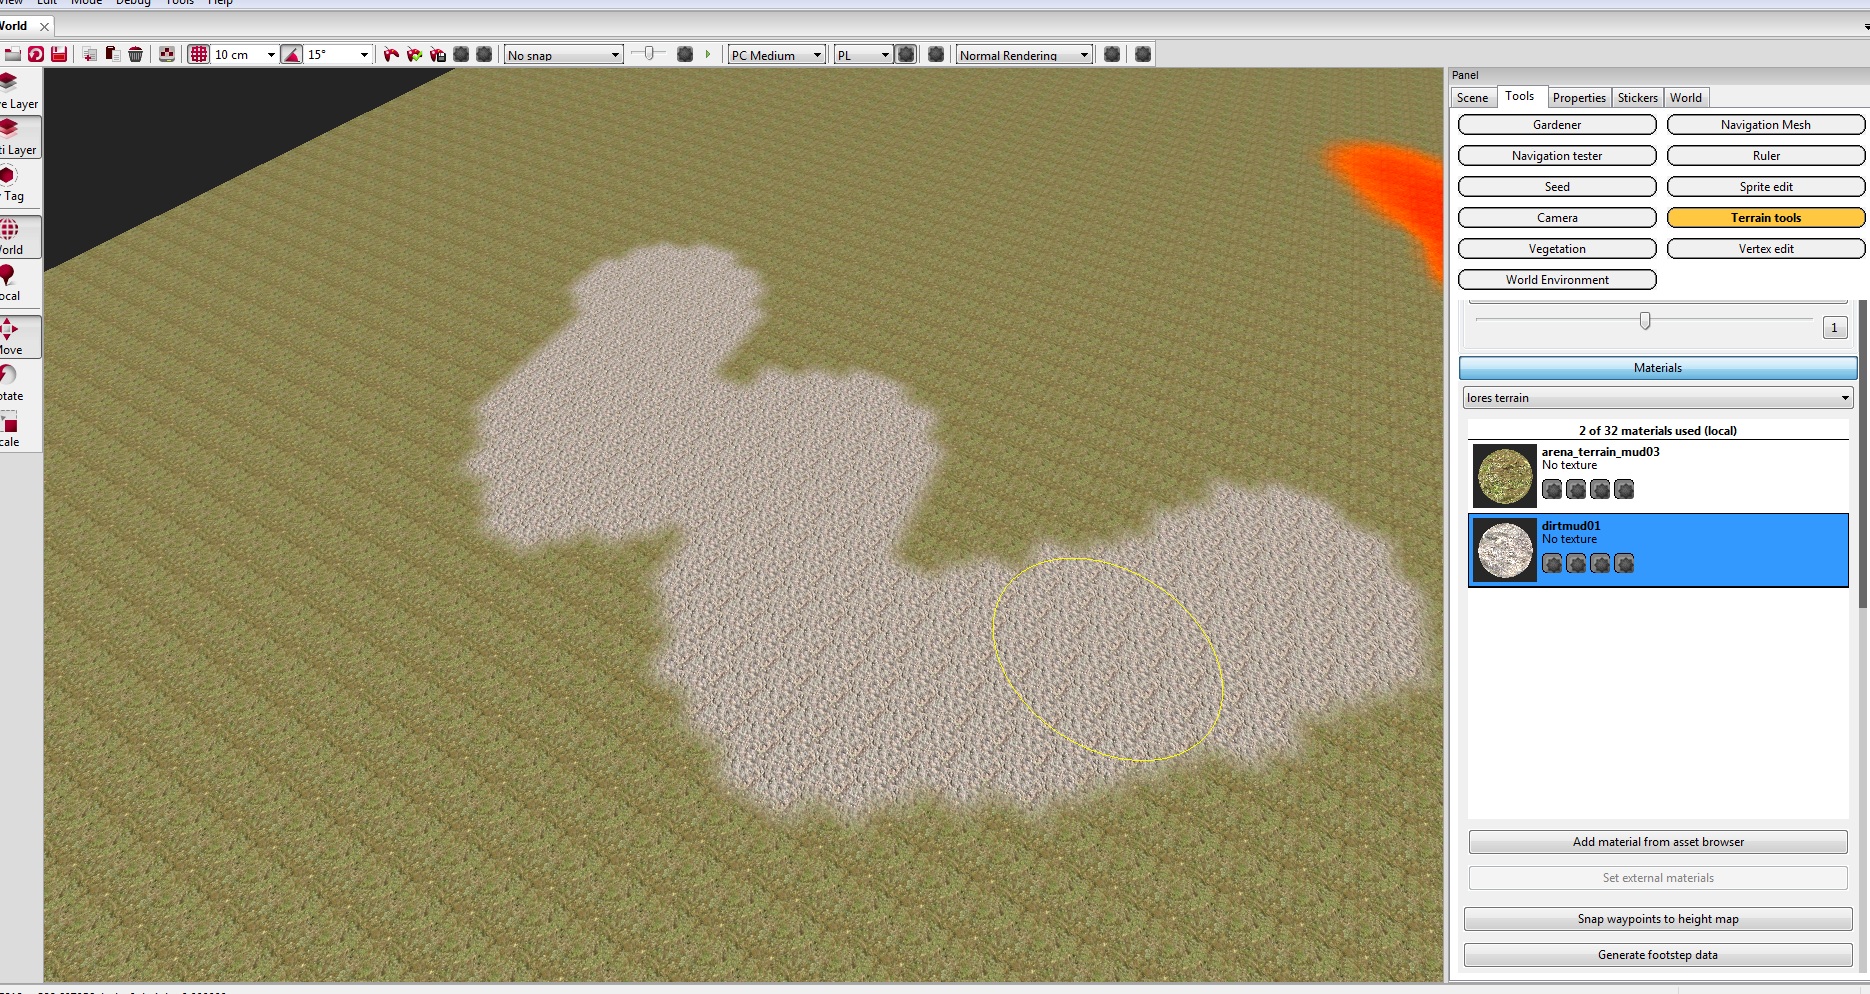
8. Set "Outside Radius", which you can find in the Modify section.
9. Select a terrain in Materials section. Click and hold to texture the terrain. (To paint on vertical surfaces, choose PlaneXZ or PlaneYZ from the DropdownList below Paint Material)
1. Go to the Scene Tab in the right panel.
2. In the Scene tab right-click on World and select Add Group in order to add a group of layers.
3. Right-click on created group and select Add Layer. Double-click on the layer to activate it.
4. Right-click on the layer you'd like to delete. Choose Remove.
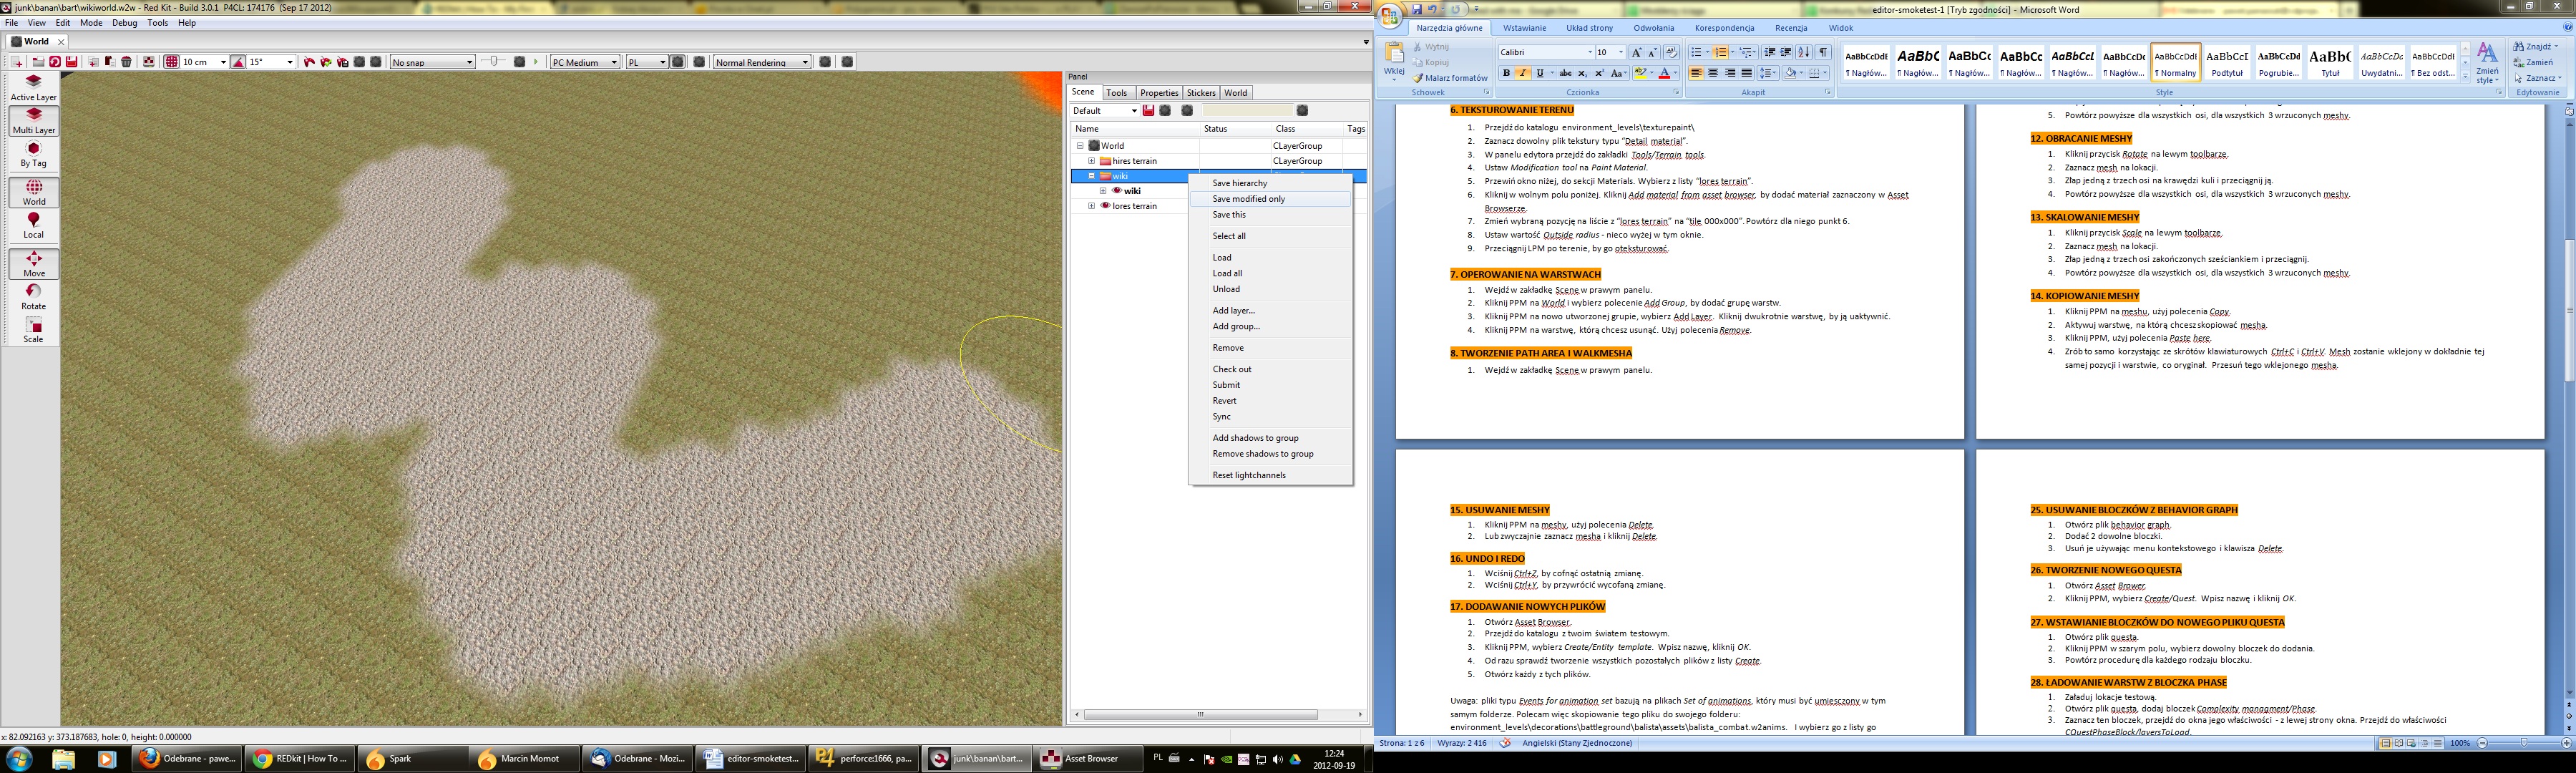
Table of contents
The different bruches (in Modification tool)
NOTE: Use shift to achieve the opposite of some of the effects.
SetScaleBiased:
It levels the terrain to previously set height - from 0
Flatten:
Sets terrain to a defined height, with rounded edges and a flat top surface (cleaner than SetScaleBiased).
The brush's depth gauge (red or green line) reveals how much higher or lower than the current land the terrain will become.
Slope:
This bruch has a degree of incline set in its parameter to build a continuous ramp via clicking and dragging.
NOTE: with a slope of zero this is an effective flattening tool.
Rise/Lower:
Raises terrain to a tapered point.
NOTE: Shift click lowers.
Rise/Lower Bias:
Raises or lowers terrain to a certain value (DOES NOT WORK in the REDkit Beta).
Paint:
Paints terrain color, which affects the textures underneath.
Paint Material:
A selected Detail Material from the Asset Browser (environment_levels > texturepaint > choose a "Detail Material") is applied to the terrain tile.
1). Click the Materials button inside the Terrain Tools panel.
2). Click the "Add material from asset browser" button.
Your material from the texturepaint folder will be loaded.
NOTE: BE SURE to repeat this process for "tile 000x000" which is located in the drop-down menu that currently says "lores terrain".
Paint Mapping:
Useful to realign textures along different axis, especially when the terrain has stretched textures (see pictures below)
The default is XY mapping. Select "Paint YZ" or "Paint XZ" from the Mapping Tool drop-down menu and use the brush carefully.
Paint Holes:
Cuts a hole in the terrain tile.
NOTE: useful to create an entrance to a cave.
Smooth:
Smoothes over sharp terrain.
NOTE: Shift+click will produce new results (it's not a reversal but has its own characteristics).
Modify Tile Parameters:
Open the dialog window for changing the the resolution and size parameters for the terrain tile. Useful for increasing the resolution of the Mask Map to improve detailed texture painting such as footpaths.
Rising/flattening the terrain
1. In the Tools/Terrain Tools tab find Modify.
2. From Modification Tool select Rise/Lower.
3. Click on any area to rise the terrain. Hold Shift and click to lower the terrain.
4. If you want to flatten the terrain select Flatten in Modification Tool.
5. Click on one of the hills and move the mouse to flatten it.
Painting the terrain
1. In Tools/Terrain Tools panel find Brush section.
2. From Modification Tool menu select Paint.
3. Choose colour from the palette at he bottom of the panel (you don't have to confirm the selection).
4. Click on the terrain to colour it.
Terrain texturing
1. Open Asset Browser and go to environment_levels\texturepaint\
2. Highlight a texture file (must be DETAIL MATERIAL type).
3. In editor panel, go to Tools>Terrain Tools tab.
4. Set Modification Tool to Paint Material.
5. Scroll to the lower part, Materials section. Choose "lores terrain".
6. Below the whitespace click "Add material from asset browser". You will see your Detail Material appear in the whitespace.
7. Change the chosen position from "lores terrain" to "tile 000x000". Repeat step 6. The terrain tile will now be covered in your chosed texture.
8. Set "Outside Radius", which you can find in the Modify section.
9. Select a terrain in Materials section. Click and hold to texture the terrain. (To paint on vertical surfaces, choose PlaneXZ or PlaneYZ from the DropdownList below Paint Material)
Using Layers
1. Go to the Scene Tab in the right panel.
2. In the Scene tab right-click on World and select Add Group in order to add a group of layers.
3. Right-click on created group and select Add Layer. Double-click on the layer to activate it.
4. Right-click on the layer you'd like to delete. Choose Remove.