
When creating water, you've probably come to a problem: you want to create water, but you can't find a mesh that fits because shape or material is/are always wrong.
This tutorial shows how to create a custom lake.
Let's start with an empty lake!
1). Go in Asset Browser
2). Select a squarish water mesh, for example puddle_big_01.
3). Copy the mesh (from the Asset Browser ).
4). Paste it into your level's folder and name it "water_lake". (Right-click->Paste as...).
NOTE: copying the mesh prevents you from modifying the original asset.
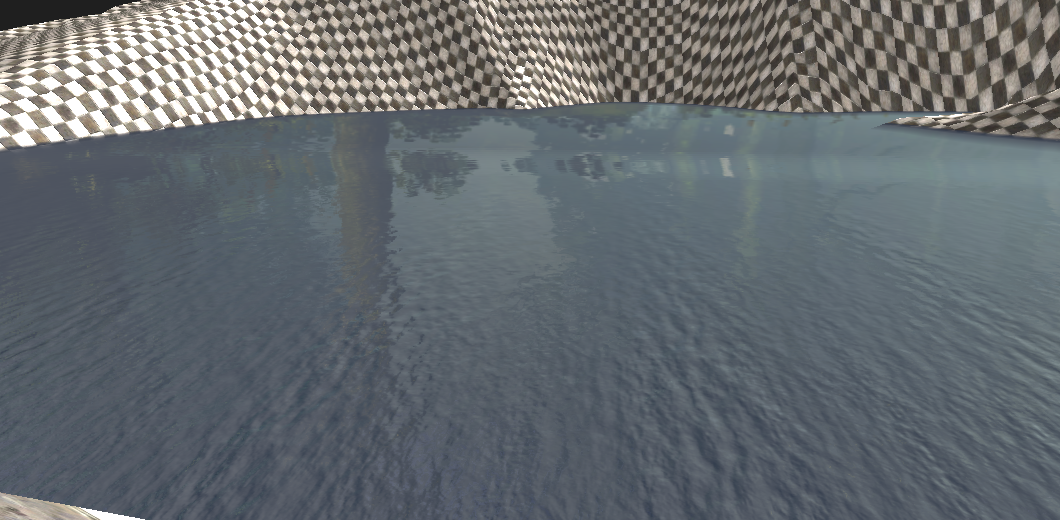
5). Then, drag the newly-created water_lake into your scene folder.
As you can see: it is too small, plus colors and reflections aren't great.
It's time to change that!
1). Scale the mesh up until it covers the hole.
NOTE: it is better to do that before editing the parameters)
2). Go back to the Asset Browser
3). Double click on the water_lake mesh to open the Mesh Editor
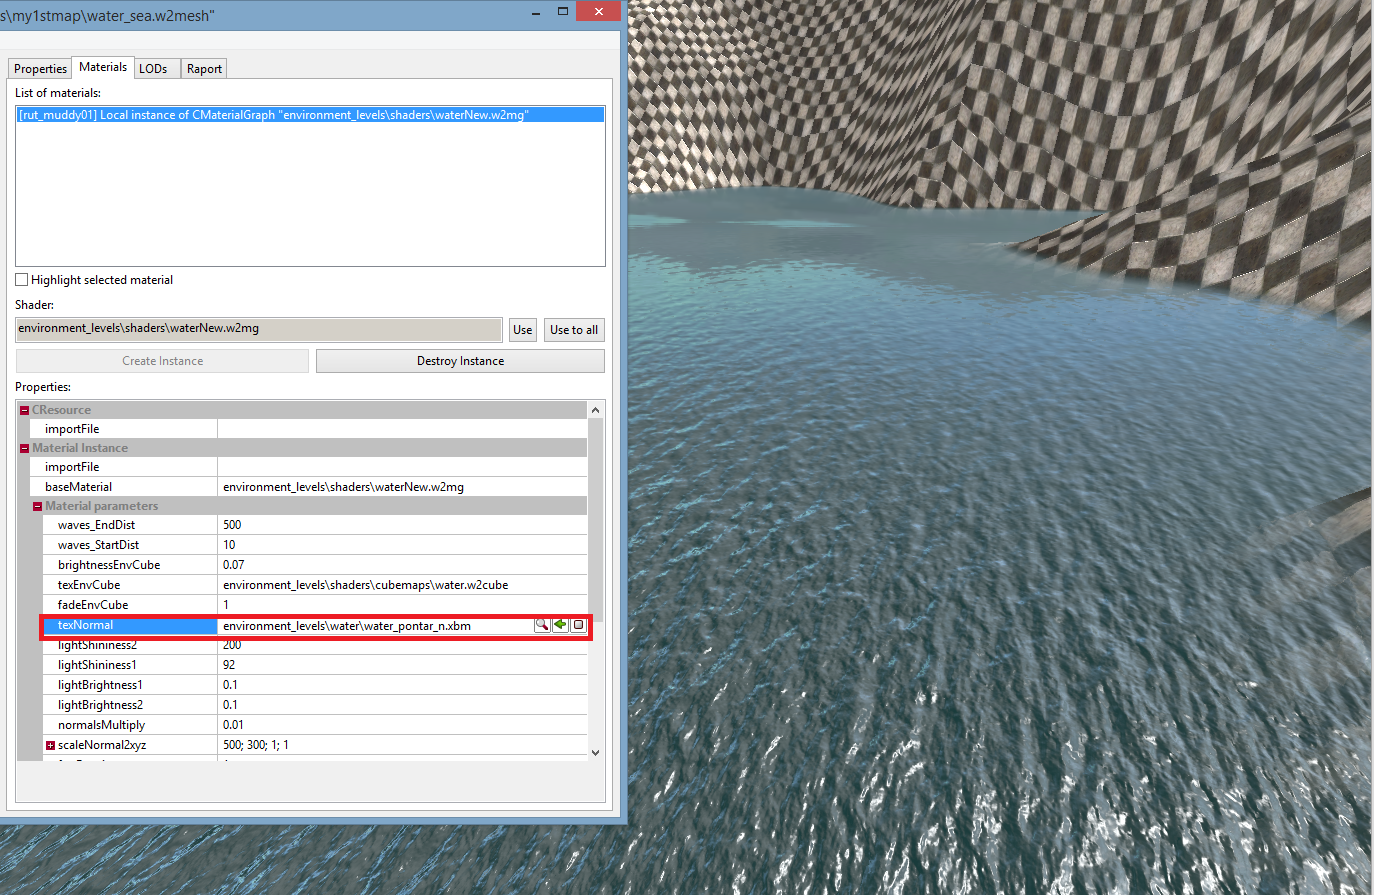
4). In the Mesh Editor (picture below) you can change the parameters.
baseMaterial:
This is the basic water shader used by your mesh. There is a couple of different water shaders, through the difference is hard to explain.
EXAMPLE: Try and see environment_levels\shaders\waternew_cubemapexaggerated.w2mg
texEnvCube:
The water reflections are not rendered in real time, they are fake reflections based on an image, which is set using this parameter (picture below with pontar_water). Pick the one that fits best your water, or your surrounding that's reflection should be faked.
brightnessEnvCube:
Brightness of the "fake reflection" selected with texEnvCube (see the different brightness below).
texNormal:
This is the normal map that determines the shape of the waves (see the different shapes below).

light...:
This allows you to regulate the brightness of the spot light that gets reflected by the water (it simulates su reflection).
NOTE: If you don't know what each value means, the best thing to do is to leave them untouched or copy settings from existing water materials. Wrong values may produce strange results with darkening and light effects.
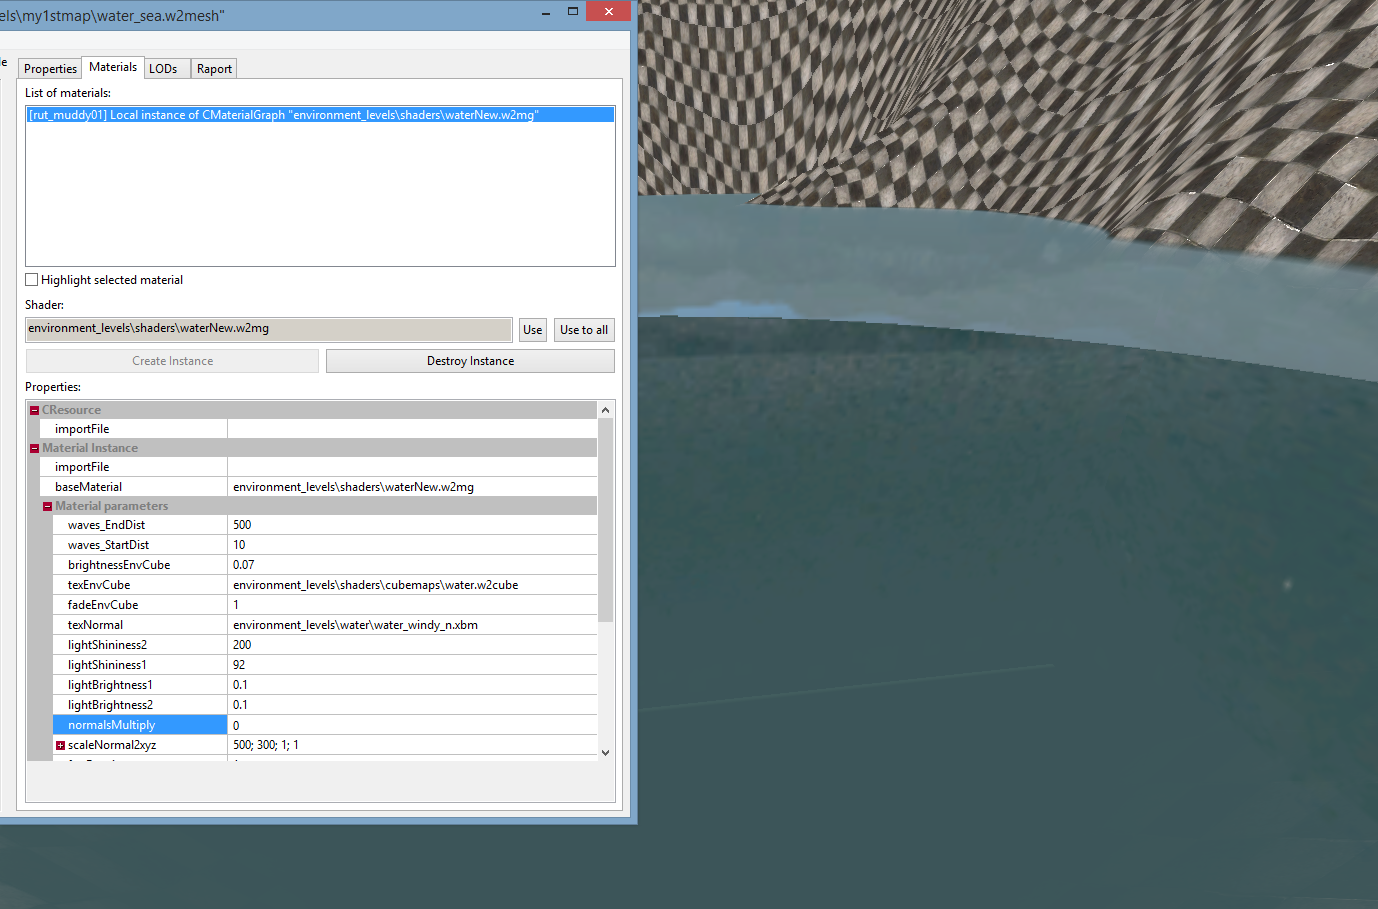
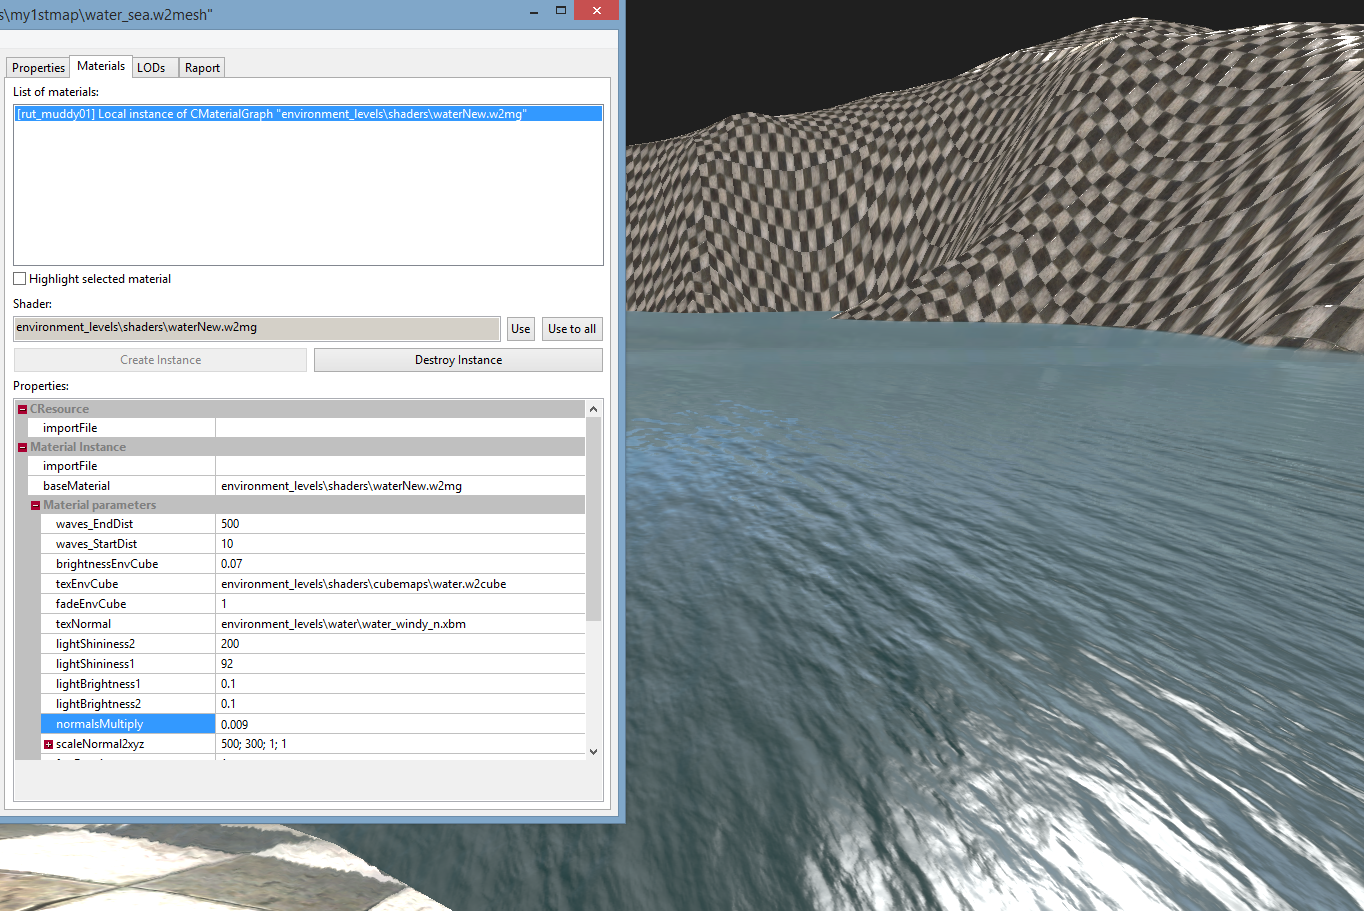
normalsMultiplay:
This parameter changes the strength of the waves.
0 means no waves, high values mean high waves, (see below images of two different values).
The height of waves is limited because this is just a normal map effect: the geometry doesn't change (no polygonal waves).
fogdensity:
Regulates how clear the water is (lower values = clear water, means that you will be able to see the ground even on deep areas).
scaleNormalxyz:
This alters the size of the waves, in different directions (lower numbers mean huge waves, higher numbers mean small waves). Only x and y values matter.
velocityWind:
Regulates the speed of the waves (in x/y coordinates), higher values mean higher speed.
fogcolor:
It's best to use these values to set the color of the water (and not diffuse color a little bit below), XYZ mean RGB. In most cases it's good to stick with very low values.
ziobermode/power:
This influences the way water is displayed on the borders of the lake (where water meets land).
NOTE: DONT FORGET TO SAVE YOUR MODIFIED MESH: File/Save.
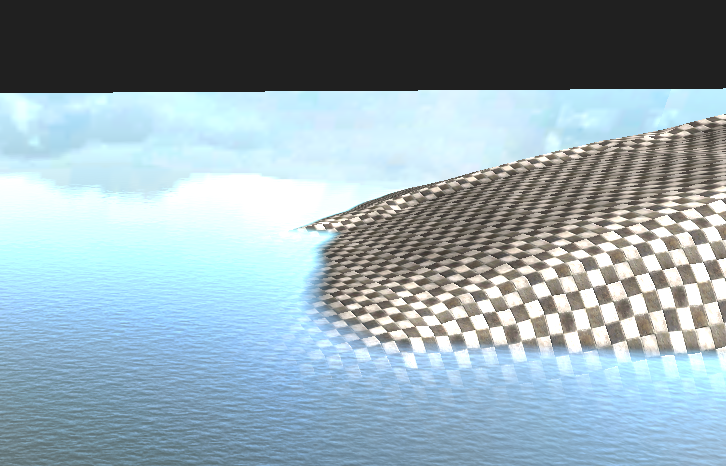
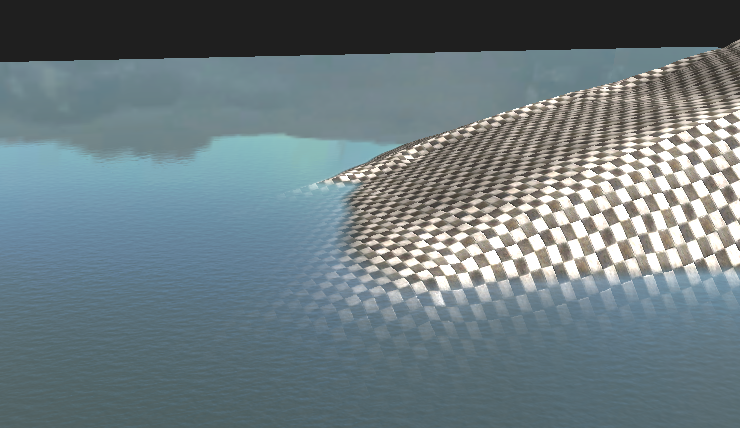
Sample results from the previous picture:
If you only want to change minor things like the color of the water, you can also change it with your Area Environment (Lighting Tutorial) without having to create a new water mesh.
Open up the "water" in your area environment parameters:
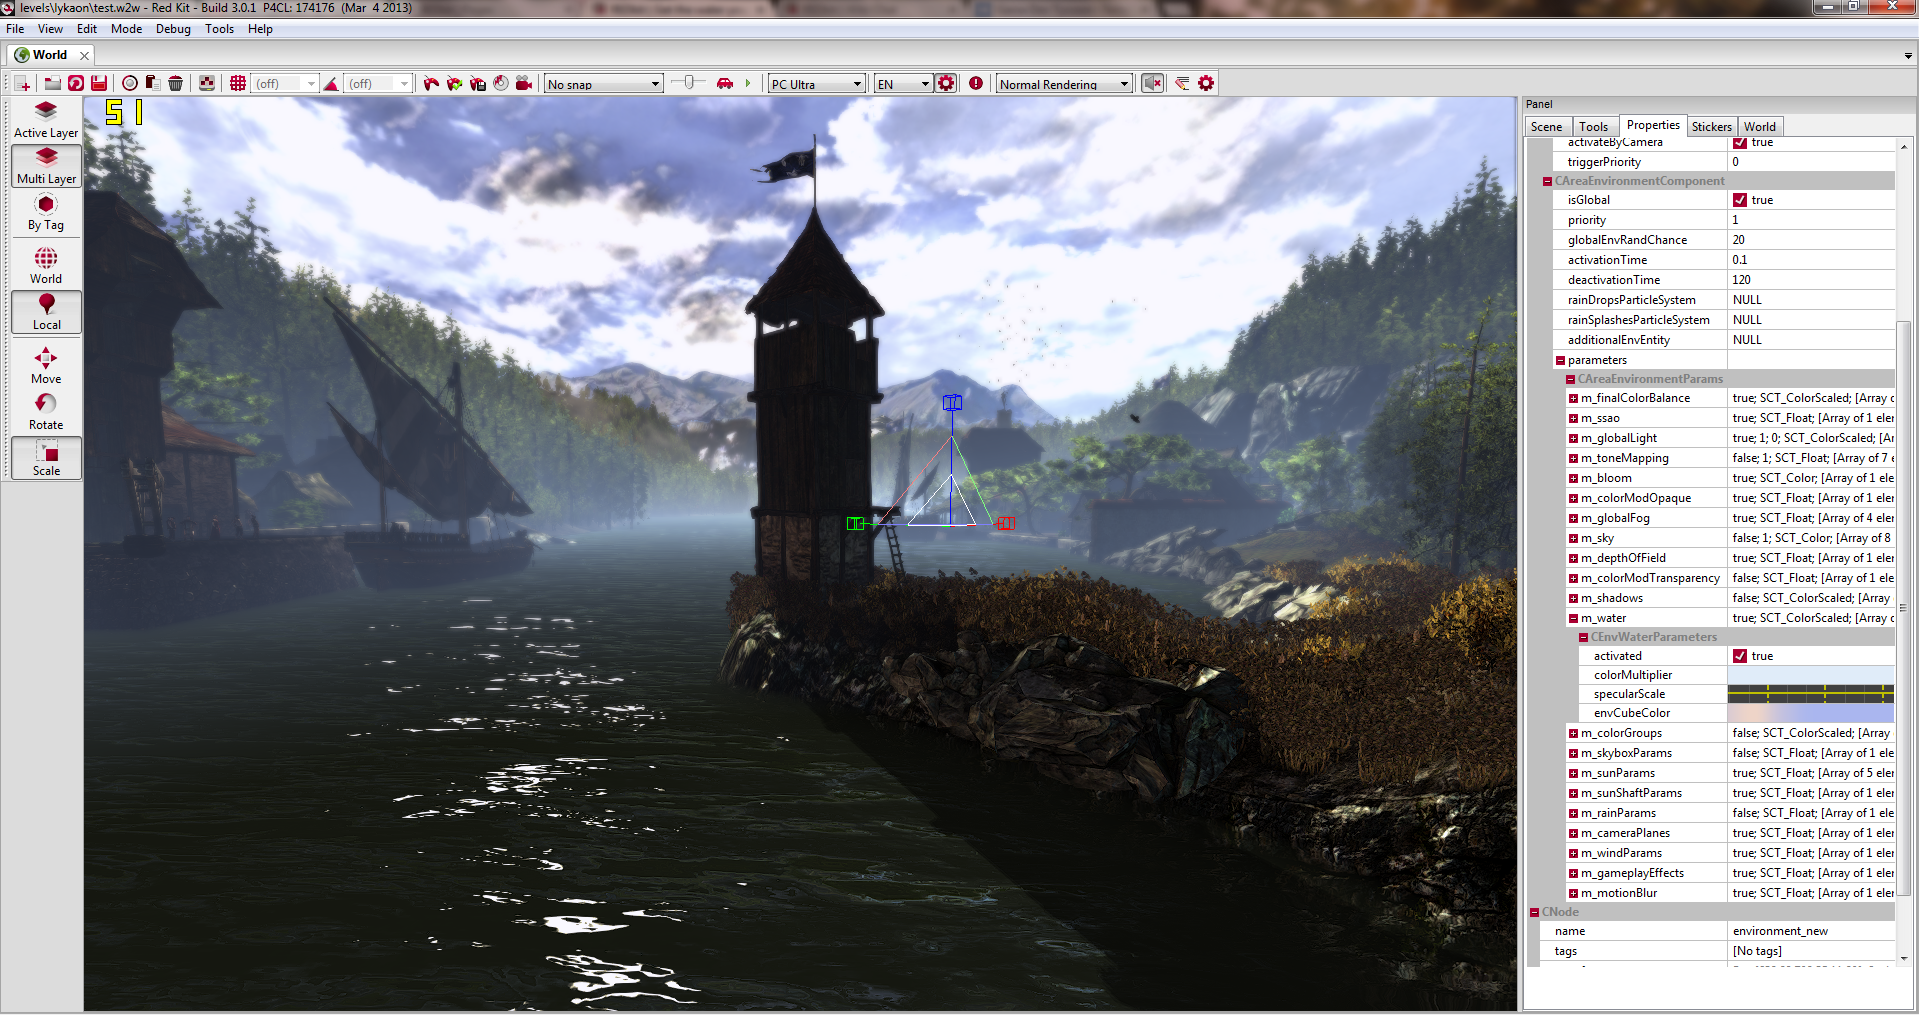
There you will see 4 options:
1. Activated: This is self-explanatory. Activates your changes or deactivates them. Whenever you change something like the color, you have to deactivate and activate "water" again to have your changes rendered.
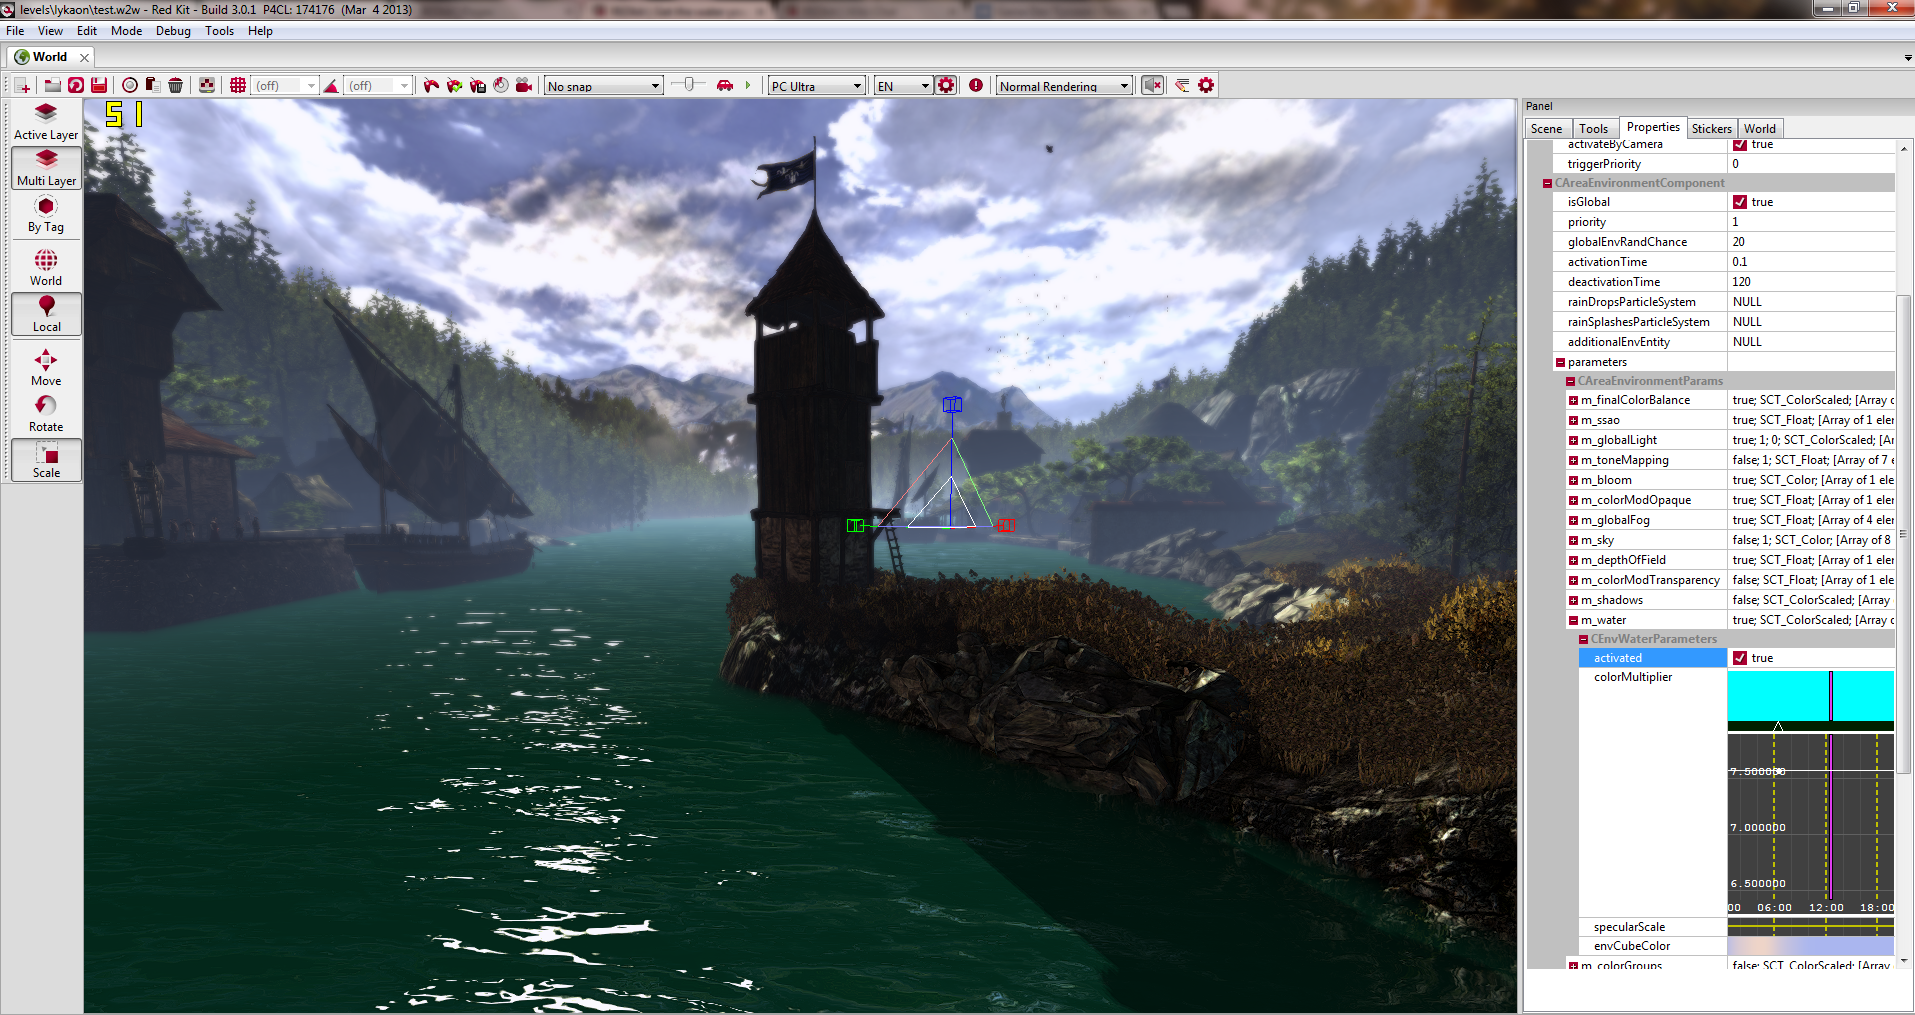
2. Color Multiplier: Changes the color. The higher you set your color, the more visible it gets. So when you only want to have a slight color (for a swamp as an example), choose a low number e.g 1000.
3. Specular Scale: Here you can choose how much your water reflects the sun.
4. envCubeColor: Here you can do the same thing as with Color Multiplier with the difference that your envCube gets more visible the higher you set your number.
Note: be aware that changing water using area environment affects all water in your level.
Example of a water mesh edited with area environment:
This tutorial shows how to create a custom lake.
Creating a custom lake
Copy your desired asset
Let's start with an empty lake!
1). Go in Asset Browser
2). Select a squarish water mesh, for example puddle_big_01.
3). Copy the mesh (from the Asset Browser ).
4). Paste it into your level's folder and name it "water_lake". (Right-click->Paste as...).
NOTE: copying the mesh prevents you from modifying the original asset.
5). Then, drag the newly-created water_lake into your scene folder.
As you can see: it is too small, plus colors and reflections aren't great.
It's time to change that!
Option 1: change its properties
1). Scale the mesh up until it covers the hole.
NOTE: it is better to do that before editing the parameters)
2). Go back to the Asset Browser
3). Double click on the water_lake mesh to open the Mesh Editor
4). In the Mesh Editor (picture below) you can change the parameters.
baseMaterial:
This is the basic water shader used by your mesh. There is a couple of different water shaders, through the difference is hard to explain.
EXAMPLE: Try and see environment_levels\shaders\waternew_cubemapexaggerated.w2mg
texEnvCube:
The water reflections are not rendered in real time, they are fake reflections based on an image, which is set using this parameter (picture below with pontar_water). Pick the one that fits best your water, or your surrounding that's reflection should be faked.
brightnessEnvCube:
Brightness of the "fake reflection" selected with texEnvCube (see the different brightness below).
texNormal:
This is the normal map that determines the shape of the waves (see the different shapes below).
light...:
This allows you to regulate the brightness of the spot light that gets reflected by the water (it simulates su reflection).
NOTE: If you don't know what each value means, the best thing to do is to leave them untouched or copy settings from existing water materials. Wrong values may produce strange results with darkening and light effects.
normalsMultiplay:
This parameter changes the strength of the waves.
0 means no waves, high values mean high waves, (see below images of two different values).
The height of waves is limited because this is just a normal map effect: the geometry doesn't change (no polygonal waves).
fogdensity:
Regulates how clear the water is (lower values = clear water, means that you will be able to see the ground even on deep areas).
scaleNormalxyz:
This alters the size of the waves, in different directions (lower numbers mean huge waves, higher numbers mean small waves). Only x and y values matter.
velocityWind:
Regulates the speed of the waves (in x/y coordinates), higher values mean higher speed.
fogcolor:
It's best to use these values to set the color of the water (and not diffuse color a little bit below), XYZ mean RGB. In most cases it's good to stick with very low values.
ziobermode/power:
This influences the way water is displayed on the borders of the lake (where water meets land).
NOTE: DONT FORGET TO SAVE YOUR MODIFIED MESH: File/Save.
Sample results from the previous picture:
Option 2: change the water with Area Environment
If you only want to change minor things like the color of the water, you can also change it with your Area Environment (Lighting Tutorial) without having to create a new water mesh.
Open up the "water" in your area environment parameters:
There you will see 4 options:
1. Activated: This is self-explanatory. Activates your changes or deactivates them. Whenever you change something like the color, you have to deactivate and activate "water" again to have your changes rendered.
2. Color Multiplier: Changes the color. The higher you set your color, the more visible it gets. So when you only want to have a slight color (for a swamp as an example), choose a low number e.g 1000.
3. Specular Scale: Here you can choose how much your water reflects the sun.
4. envCubeColor: Here you can do the same thing as with Color Multiplier with the difference that your envCube gets more visible the higher you set your number.
Note: be aware that changing water using area environment affects all water in your level.
Example of a water mesh edited with area environment: